Plus: learn how to instantly update your CRM software with Zapier!
When it comes to lead generation, having a well-structured lead capture form is absolutely essential. As the focal point of your landing page, a lead capture form serves as a way to collect contact information from potential customers.
With an intuitive drag and drop builder, advanced form styling, and the ability to integrate with various CRM systems, Cognito Forms makes it easy to create the perfect lead capture form for your businesses’ landing page:
1. Build
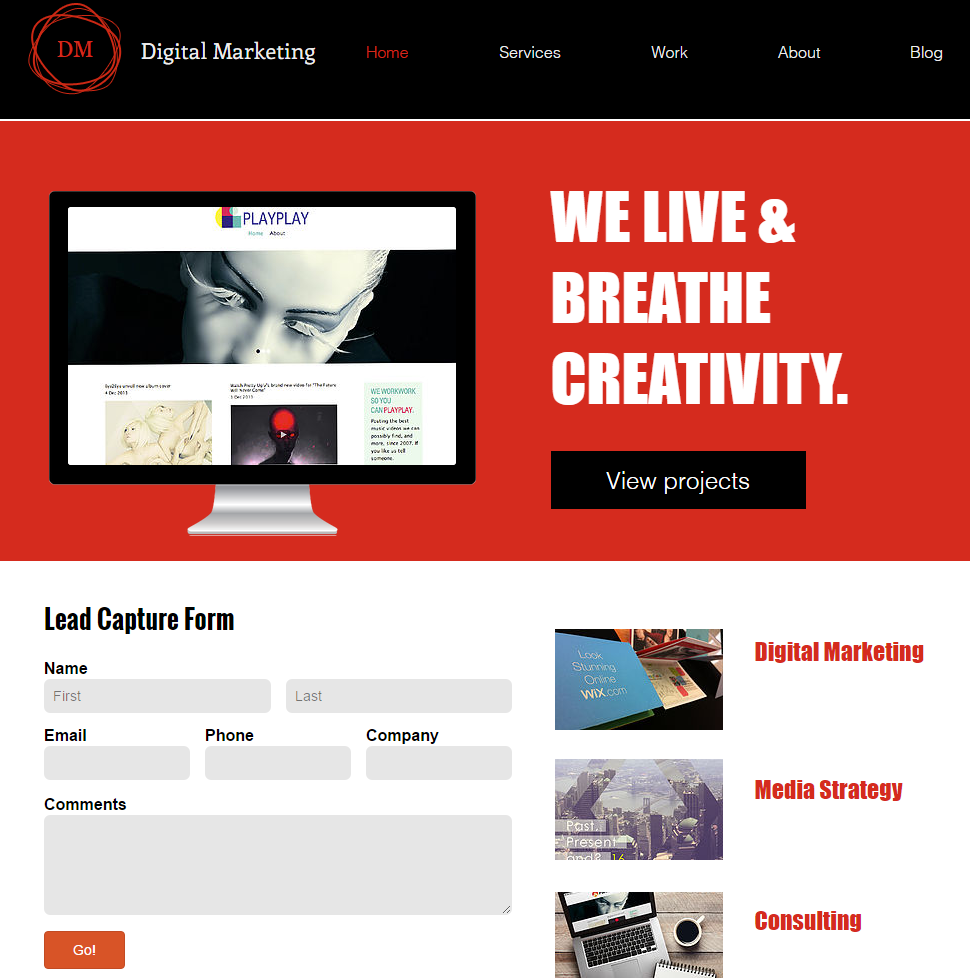
The length of your form really depends on the audience you’re trying to reach - a shorter form will attract a greater number of people, while a longer form will gather additional information to collect higher quality leads. Either way, there are a couple of form fields that you’re definitely going to need; like First and Last Name, Phone Number, and Email Address.
You can create the form above in just a couple of minutes. Once you set up an account in Cognito Forms and open up the form builder, you can add form fields by clicking on one of the placeholders and choosing the field type from the left-hand pane in your form builder. Each field type is designed to capture specific information - for example, the Phone field only allows you to enter numerical digits in a specific format (xxx-xxx-xxxx), while the Email field requires that you enter both “@” and a domain name.
If you just want to collect a text value, like “Company”, the Textbox field is the way to go. You can set your textbox to contain a single line, or you can set it to multiple lines to collect lengthier questions and comments.
Finally, the Submit button at the bottom of your form is a small but highly important detail; according to Hubspot, landing pages with buttons labeled “Submit” actually have lower conversion rates than those with alternative wording. In this case, the label on our form (“Go!”) feels more inviting and less of a commitment than “Submit”.
2. Style
On the Publish page in your builder, the Style Editor offers a plethora of form styling options. You can set unique attributes for different form elements, change the style of your fields, and set unique background colors and images.

If you’re planning on embedding your form into your website, you also have the option to apply form styles in your website’s style sheet.
3. Share
Embed your form directly into your website’s landing page to create a completely custom experience for your visitors. Just a quick copy and paste of a short code into your HTML allows you to have a form that looks like it belongs on your website - no extensive coding knowledge required.
Best of all, Cognito Forms are fully responsive and look great on any device; be it laptop, tablet, or smartphone. If your website is also responsive, your form will automatically adjust to the width of your content container:

Plus, you can also easily share your form on various social media platforms (like Facebook, Twitter, and Google+), or simply copy and share a direct link to the form that visitors can access on a separate page.
4. Integrate
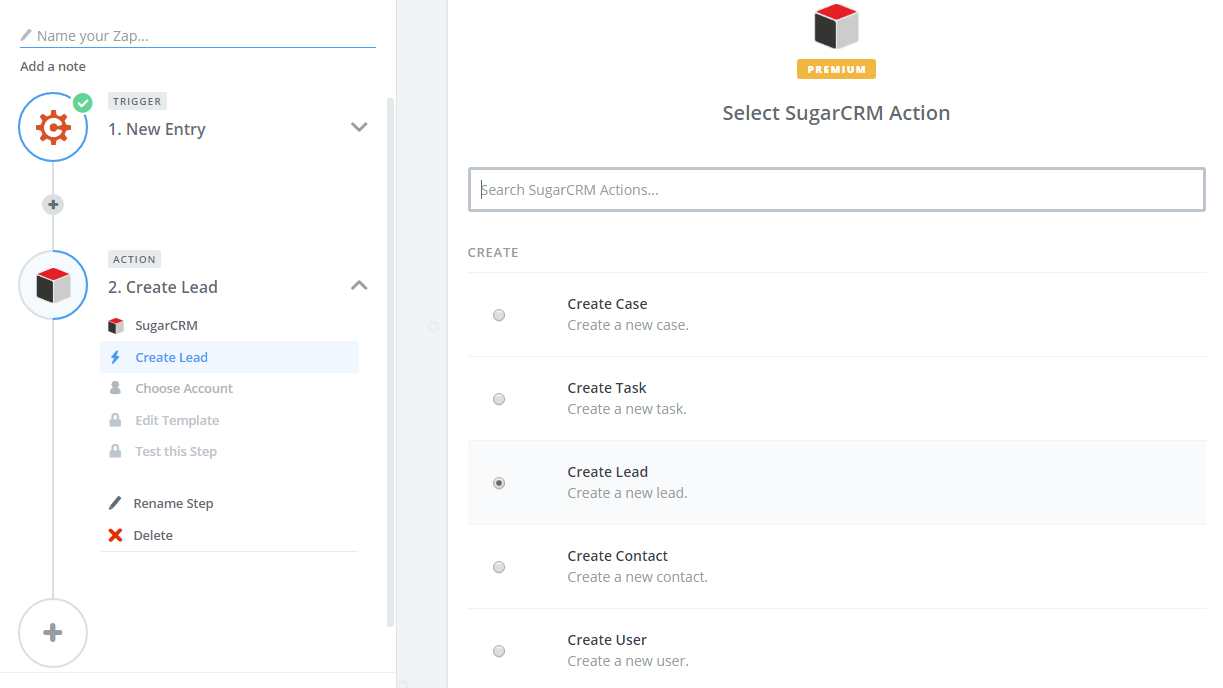
With the help of our Zapier integration, you can sync your Cognito Forms account with your CRM software to automatically create a new lead whenever a new form entry is submitted. Here’s how it works:
-
After signing up for a Zapier account, start by creating your first Zap. A Zap is a link between Cognito Forms and your CRM software (SugarCRM, Salesforce, HubSpot CRM, etc.)
-
Specify “New Entry” in Cognito Forms as the event that starts your Zap.
-
Select “Create Lead” as the action your Zap performs.

-
Give your Zap a test run, and then you’re done! Now, whenever a visitor fills out and submits your lead capture form, a new lead will be created instantly in your CRM software.
