Many of our customers are taking advantage of the ability to collect payments with their forms – but did you know you could use your payment forms to let your customers pay later?
Start with a Payment Form
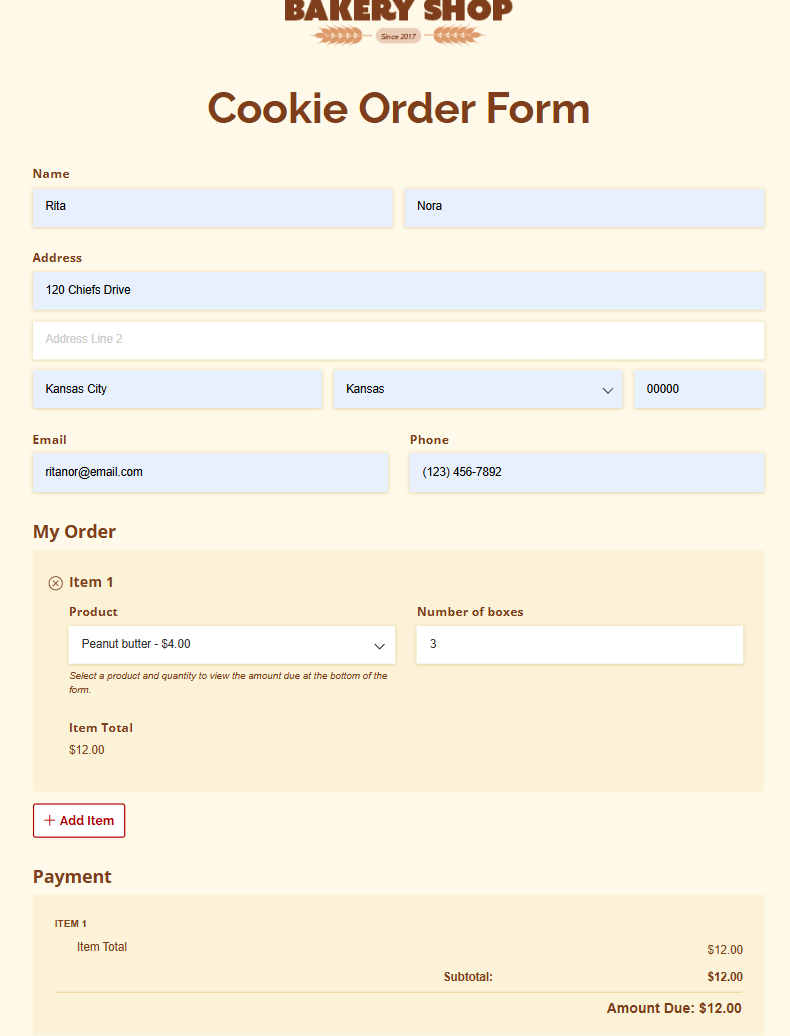
There are a ton of ways you can use your forms with payment: raising funds, collecting event registrations, selling online, and more. Let’s start with a form where we’re selling boxes of homemade cookies.
TIP: Use repeating sections to keep your order forms short and concise!
To create this form, I started with a Choice field that I assigned prices to, then used a Number field to let my customers select a quantity. The “Item Total” is actually a Price field, where I’ve set a calculation to multiply the assigned price of the choice by the quantity:
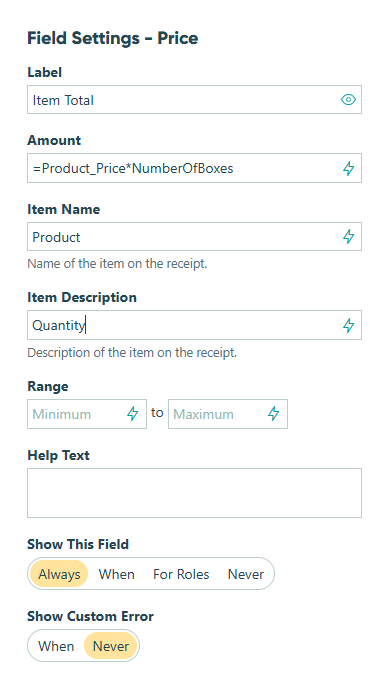
The Price field automatically collects payment on the result of the calculation and adds it to the subtotal at the bottom.
Determine Your Payment Requirements
Some people prefer to pay in cash, or maybe you want to let people place an order, then pay when the cookies are delivered. Easy! Just visit your Payment Settings:
At the top, you’ll see the option to “Process Payment?”. You have a few different options here.
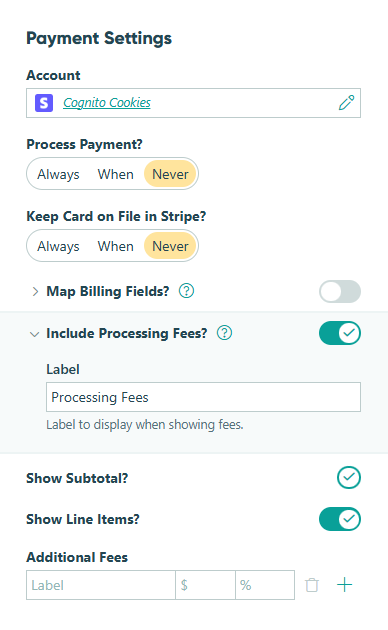
Require payment never (issue invoices)
If you want to only use your form to issue invoices so people can pay later, select “Never” for this option. Your customers will still see the amount due and all the line items, but they’ll be able to submit the form without entering any card information.
Require payment when…
Selecting “When” for this option allows you to set conditions for when payment is required. For example, you could require payment when the subtotal is at least $20, or give your customers the option to pay now or later.
If you want to require payment based on the amount, you can use this calculation:
=MyOrder.Sum(ItemTotal) >= 20
“My Order” is the name of our repeating section, and “Item Total” is the name of our Price field, so our calculation adds each item’s cost and checks whether the subtotal is greater than or equal to $20.
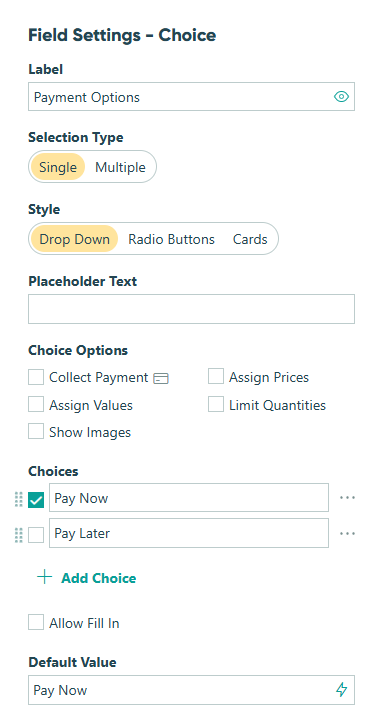
If you want to give your customers the option to pay later, you’ll need to add another Choice field. In our example, the Choice field is called “Payment Options” and has two options: “Pay Now” and “Pay Later”.
Now, you can set the “Require Payment When” to this calculation:
=(PaymentOptions = "Pay Now")
If a customer chooses “Pay Now”, they’ll have to put in their card information to submit the form. If they select “Pay Later”, they can just submit their order without payment.
Send the Invoice or Receipt
Once you’ve received an order, the customer will need an invoice or order slip. You can set up automatic delivery of your invoices when you build your form, by managing Email Confirmations in your Submission Settings:
Check the box that says “Send email confirmations?” In the From field, enter the email address that you want your customers to be able to reply to if they have questions about their order. The From field is defaulted to the email address associated with your organization, but you can change it if you’d like.
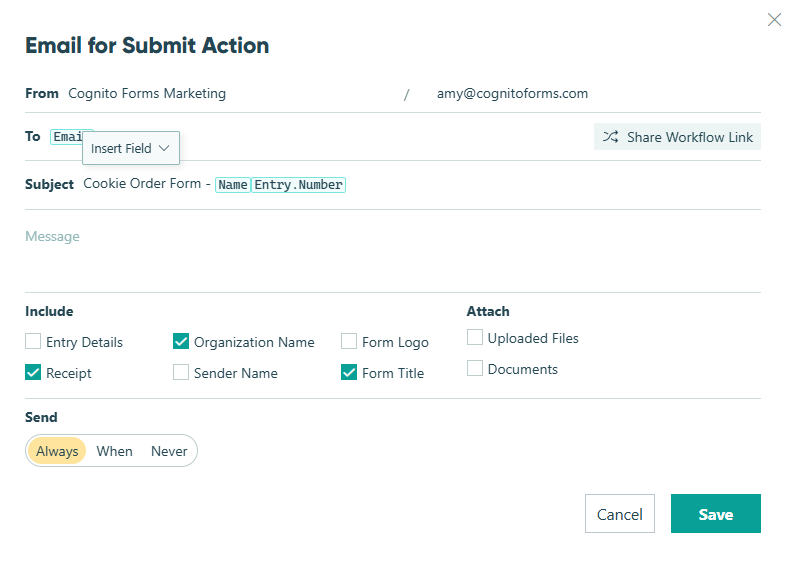
In the To field, select the name of your Email field (ours is just called “Email”) from the dropdown. This means that whatever email address your customer enters in the field is the address that will receive the invoice.
You can also create a custom subject line and message to go along with your invoice, thanking your customers for their order. You can insert data from other form fields using the “Insert Field” option.
Keep the “Include receipt?” option checked to show the payment details, and check “Include entry details?” if you’d like to include the full form entry in the emailed invoice.
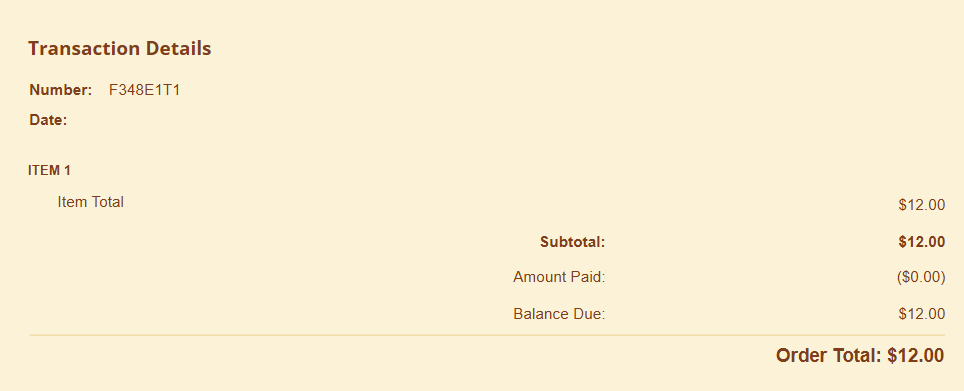
A sample of an emailed receipt.
One More Thing!
You can still manage the order in Cognito Forms when your customers don’t pay when they submit your form. Invoiced orders show up in your Entries as “Unpaid”. You can edit those entries later to process payment by credit card or to mark it as paid by cash.
Collecting payment is easy with Cognito Forms – get started right now.