Use the Person field to simplify user and task assignments for employees, clients, volunteers, or anyone involved in your workflow processes.
The Person field looks up a list of people based on entries from another form, where each entry represents a person. This connection populates fields with relevant personal details and automatically assigns forms to the right people.
How to create a lookup with the Person field
First, you need to make your source form:
- Make a new form from scratch.
- Add a few fields to your new form, such as Name, Email, and Department.
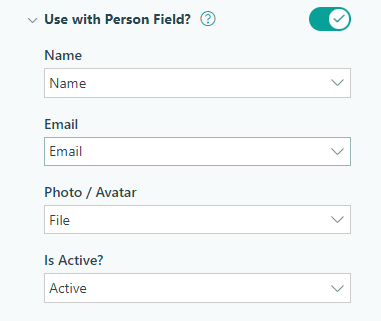
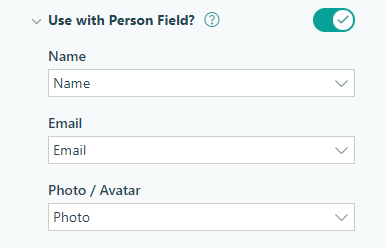
- Enable Use with Person Field? in the form settings. Select the name of your matching fields from each drop-down:
- Name requires a Name field.
- Email requires an Email field.
- Photo / Avatar optionally requires a File Upload field.
- Is Active? optionally requires a Yes/No field.
- Save your form.
- Go to the Entries page and fill out a couple of sample entries.
Now, it’s time to build the form that references the source form:
-
Make a new form from scratch.
-
In the builder, click on an empty placeholder to add a Person field. Label the Person field ‘Name’, and set it to either the dropdown, radio buttons, or checkboxes type.
-
In the Person field settings, find the Look Up People From option and select the source form.
-
Save and then open up your form. The Person field (‘Name’) should contain a list of names from the entries of your source form.
Refer to our help topic for more information about the Person field settings.
Scenarios
Populate a list of people on multiple forms
When you need to use the same list of choices on multiple forms, the Person field can help you manage those choices from a single form. For example, if your organization is hosting multiple events this year, you can collect all your member information in one place and then reference that list on various event forms. Here’s how it works:
-
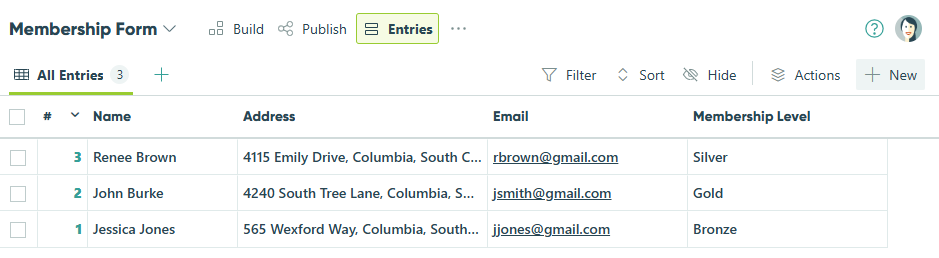
Create a form to collect member information. Make sure to include any necessary fields, like Name, Address, Email, Membership Level, etc. Optionally, you can include a File Upload field for member photos.
-
In your form settings, enable Use with Person Field? and map the matching fields from each drop-down.
-
Populate the form entries for each member.
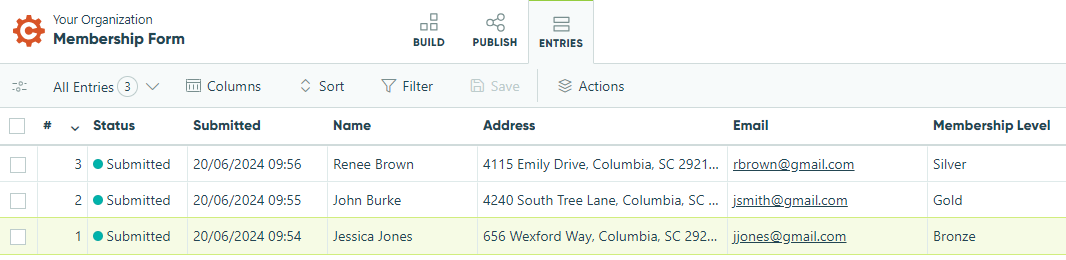
-
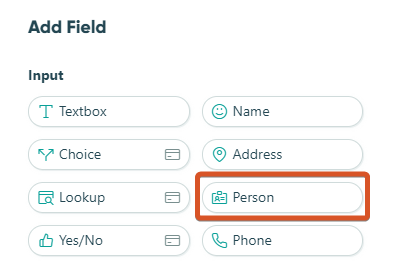
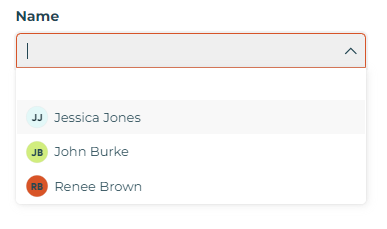
Next, create a form for your upcoming event. Select Person from the Add Field menu and label your Person field ‘Name’.
-
In the Person field settings, find the Look Up People From option and select the Membership form.
-
Save and open up your form. The Person field (‘Name’) will display a list of names based on the entries from the Membership form. Best of all, this list will update automatically as we add, remove, or update members!
Default form fields to the current user
When you default a Person field to the currently logged-in user, you ensure a seamless experience for organization members. For example, when employees submit a PTO request, you can automatically populate details like Name and Department.
-
Create an employee list form. Make sure to include any necessary fields, like Name, Address, Email, Department, etc. Optionally, you can include a File Upload field for employee photos.
-
In your form settings, enable Use with Person Field? and map the matching fields from each drop-down.

-
Populate the form entries with employee details.
-
Next, create a PTO Request form. Under the Workflow menu, go to Public Links and set Require Authentication to Always.
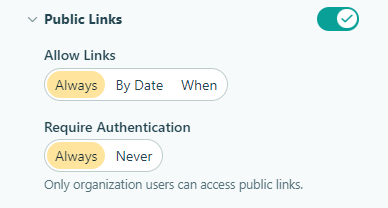
-
Select Person from the Add Field menu and label your Person field ‘Name’.
-
In the Person field settings, find the Look Up People From option and select the Employee List form. Select Default To – Current User and Read-Only – Always.
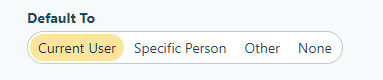
-
Add a Textbox field for the Department. For the Default Value, enter the name of your Person field followed by the Department (Ex:
=Name.Department). Select Read-Only – Always. -
Save and open up your form. Now, the Name and Department fields will default to the current user.
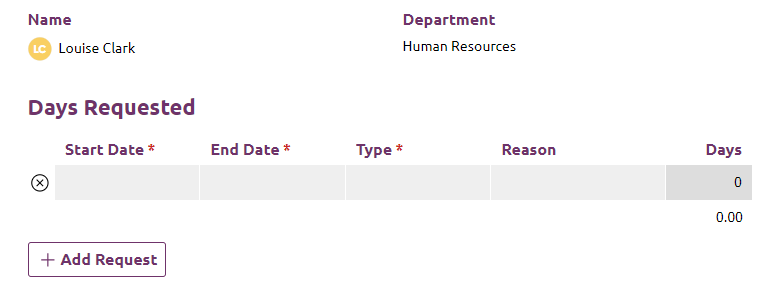
Assign forms and route notifications to the right people
Person fields simplify email routing and enable automatic form assignments based on manager, department, or any custom criteria. For example, let’s say you have a feedback form for employees. When a manager initiates the workflow, we want to email one of an employee’s peers to request a performance review.
-
Create an employee list form. Make sure to include any necessary fields, like Name, Address, Email, Department, etc.
-
In your form settings, enable Use with Person Field? and map the matching fields from each drop-down.
-
Populate the form entries with employee details.
-
Create an employee feedback form. In the Workflow menu, create roles for the Manager, Reviewer, and HR.
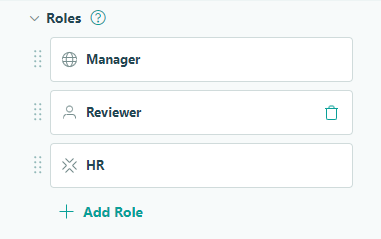
-
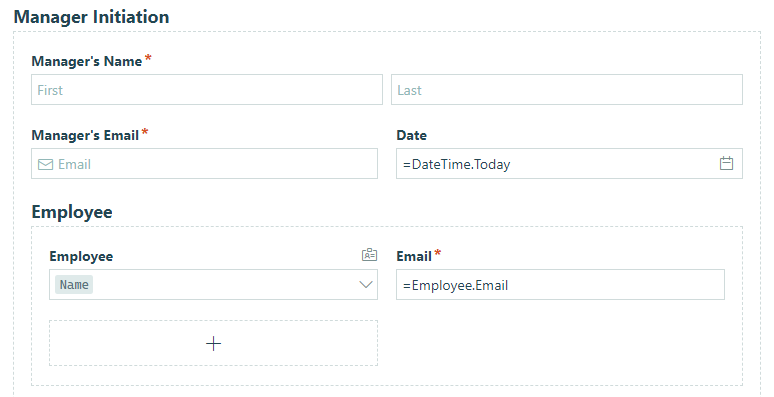
Add a ‘Manager Initiation’ section and include fields for the Manager’s name, email, and current date. Set the section to only show for the Manager and HR roles.
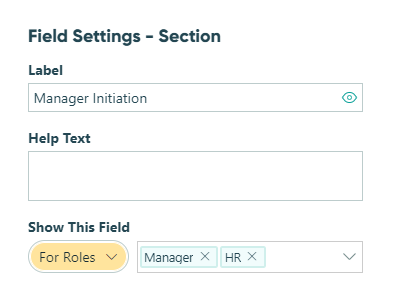
-
Create an ‘Employee’ section within the Manager Initiation section. Add a Person field field labelled ‘Employee’ and an Email field that defaults to the employee email (
=Employee.Email). Set the Email field to Read-Only – Always.
-
Create a separate Reviewer section under the Manager section. Add a Person field field labeled ‘Employee’ and an Email field that defaults to the employee email (
=Employee.Email). Set the Email field to Read-Only – Always. -
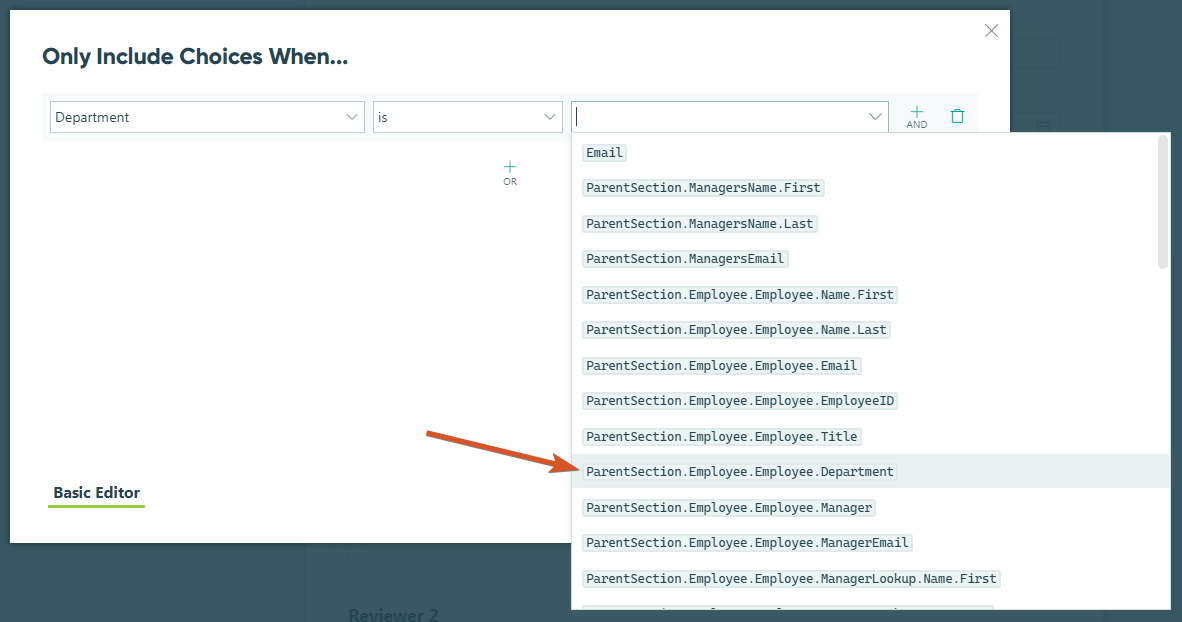
In the Person field settings, find the Include option and set the filter to only include choices where the reviewer’s department matches the employee’s department.
-
Open the Workflow menu and open the action settings for the Submit action. Add a new email notification under Send Emails:
- Set From to the Manager’s name and email fields.
- Set To to the Reviewer’s email field.
- Include a workflow link for the Reviewer Role.
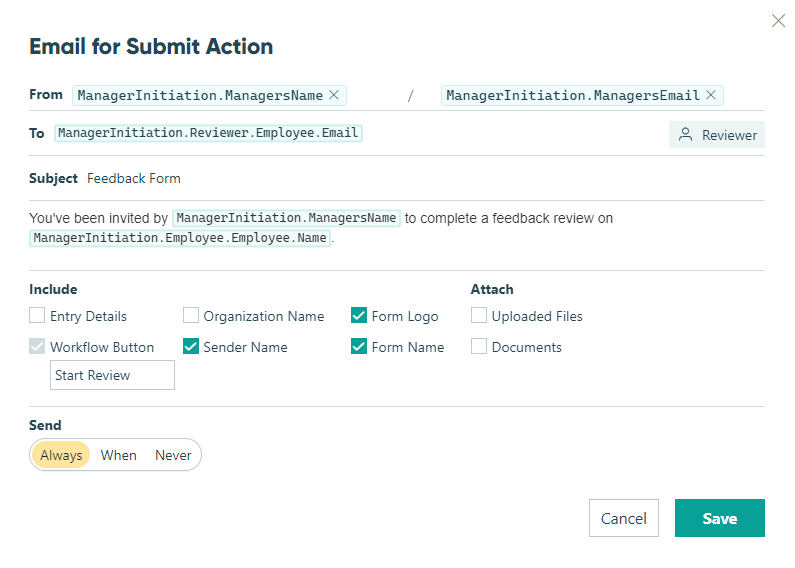
-
Click Save. Now your email notification will automatically be routed to the selected reviewer when a manager submits the form.
Filter choices by active or inactive
What happens when an employee is no longer active? Rather than deleting data, you can use the Include option to simply change the included choice values at any time. Plus, even when you adjust the filter, the previously selected choice value will still be there when you update the entry.
Let’s say you have a Timesheet form. Using the filter, you can filter out employees that are inactive:
-
Create an employee list form. Make sure to include any necessary fields, like Name, Address, Email, Department, etc. Optionally, you can include a File Upload field for employee photos.
-
Include a Yes/No field to indicate if the employee is active.
-
In your form settings, enable Use with Person Field? and map the matching fields from each drop-down.
-
Populate the form entries with employee details.
-
Next, create a Timesheet form. Select Person from the Add Field menu and label your Person field ‘Name’.
-
In the Person field settings, find the Look Up People From option and select the Employee List form.
-
Find the Include option and set the filter to only include choices where ‘Active’ is yes.

-
Save and open up your form. Now, the ‘Name’ dropdown will only display employees that are currently active.
Use the Person field to simplify user and task assignments for employees, clients, volunteers, or anyone involved in your workflow processes.
The Person field looks up a list of people based on entries from another form, where each entry represents a person. This connection populates fields with relevant personal details and automatically assigns forms to the right people.
How to create a lookup with the Person field
First, you need to make your source form:
- Make a new form from scratch.
- Add a few fields to your new form, such as Name, Email, and Department.
- Enable Use with Person Field? in the form settings. Select the name of your matching fields from each drop-down:
- Name requires a Name field.
- Email requires an Email field.
- Photo / Avatar optionally requires a File Upload field.
- Is Active? optionally requires a Yes/No field.
- Save your form.
- Go to the form entry view and fill out a couple of sample entries.
Now, it’s time to build the form that references the source form:
-
Make a new form from scratch.
-
In the builder, click on an empty placeholder to add a Person field. Label the Person field ‘Name’, and set it to either the dropdown, radio buttons, or checkboxes type.
-
In the Person field settings, find the Look Up People From option and select the source form.
-
Save and then open up your form. The Person field (‘Name’) should contain a list of names from the entries of your source form.
Refer to our help topic for more information about the Person field settings.
Scenarios
Populate a list of people on multiple forms
When you need to use the same list of choices on multiple forms, the Person field can help you manage those choices from a single form. For example, if your organization is hosting multiple events this year, you can collect all your member information in one place and then reference that list on various event forms. Here’s how it works:
-
Create a form to collect member information. Make sure to include any necessary fields, like Name, Address, Email, Membership Level, etc. Optionally, you can include a File Upload field for member photos.
-
In your form settings, enable Use with Person Field? and map the matching fields from each drop-down.
-
Populate the form entries for each member.
-
Next, create a form for your upcoming event. Select Person from the Add Field menu and label your Person field ‘Name’.
-
In the Person field settings, find the Look Up People From option and select the Membership form.
-
Save and open up your form. The Person field (‘Name’) will display a list of names based on the entries from the Membership form. Best of all, this list will update automatically as we add, remove, or update members!
Default form fields to the current user
When you default a Person field to the currently logged-in user, you ensure a seamless experience for organization members. For example, when employees submit a PTO request, you can automatically populate details like Name and Department.
-
Create an employee list form. Make sure to include any necessary fields, like Name, Address, Email, Department, etc. Optionally, you can include a File Upload field for employee photos.
-
In your form settings, enable Use with Person Field? and map the matching fields from each drop-down.
-
Populate the form entries with employee details.
-
Next, create a PTO Request form. Under the Workflow menu, go to Public Links and set Require Authentication to Always.
-
Select Person from the Add Field menu and label your Person field ‘Name’.
-
In the Person field settings, find the Look Up People From option and select the Employee List form. Select Default To – Current User and Read-Only – Always.
-
Add a Textbox field for the Department. For the Default Value, enter the name of your Person field followed by the Department (Ex:
=Name.Department). Select Read-Only – Always. -
Save and open up your form. Now, the Name and Department fields will default to the current user.
Assign forms and route notifications to the right people
Person fields simplify email routing and enable automatic form assignments based on manager, department, or any custom criteria. For example, let’s say you have a feedback form for employees. When a manager initiates the workflow, we want to email one of an employee’s peers to request a performance review.
-
Create an employee list form. Make sure to include any necessary fields, like Name, Address, Email, Department, etc.
-
In your form settings, enable Use with Person Field? and map the matching fields from each drop-down.
-
Populate the form entries with employee details.
-
Create an employee feedback form. In the Workflow menu, create roles for the Manager, Reviewer, and HR.
-
Add a ‘Manager Initiation’ section and include fields for the Manager’s name, email, and current date. Set the section to only show for the Manager and HR roles.
-
Create an ‘Employee’ section within the Manager Initiation section. Add a Person field field labelled ‘Employee’ and an Email field that defaults to the employee email (
=Employee.Email). Set the Email field to Read-Only – Always.
-
Create a separate Reviewer section under the Manager section. Add a Person field field labeled ‘Employee’ and an Email field that defaults to the employee email (
=Employee.Email). Set the Email field to Read-Only – Always. -
In the Person field settings, find the Include option and set the filter to only include choices where the reviewer’s department matches the employee’s department.
-
Open the Workflow menu and open the action settings for the Submit action. Add a new email notification under Send Emails:
- Set From to the Manager’s name and email fields.
- Set To to the Reviewer’s email field.
- Include a workflow link for the Reviewer Role.
-
Click Save. Now your email notification will automatically be routed to the selected reviewer when a manager submits the form.
Filter choices by active or inactive
What happens when an employee is no longer active? Rather than deleting data, you can use the Include option to simply change the included choice values at any time. Plus, even when you adjust the filter, the previously selected choice value will still be there when you update the entry.
Let’s say you have a Timesheet form. Using the filter, you can filter out employees that are inactive:
-
Create an employee list form. Make sure to include any necessary fields, like Name, Address, Email, Department, etc. Optionally, you can include a File Upload field for employee photos.
-
Include a Yes/No field to indicate if the employee is active.
-
In your form settings, enable Use with Person Field? and map the matching fields from each drop-down.
-
Populate the form entries with employee details.
-
Next, create a Timesheet form. Select Person from the Add Field menu and label your Person field ‘Name’.
-
In the Person field settings, find the Look Up People From option and select the Employee List form.
-
Find the Include option and set the filter to only include choices where ‘Active’ is yes.
-
Save and open up your form. Now, the ‘Name’ dropdown will only display employees that are currently active.