With Cognito Forms, you can automate both complex and routine business processes using Workflow. Most organizations will have a basic approval workflow of some kind that exists within their everyday operations – one that requires an approval, denial, or request for more information in regards to a submission.
An expense report approval is a great example of this kind of workflow. The guide below follows the Expense Report template that we’ve created, and below you’ll find key considerations for how to create this workflow.
This page is meant to serve as a guide to inform your own workflow. For a more in-depth look into creating workflows with Cognito Forms, be sure to check out our Workflow help section.
Setting up an Expense Report
In our expense report workflow, the process begins when an employee submits a receipt for a business expense. This entry is then reviewed by a manager who can approve the expense, deny it, or ask for more information. Once the entry is approved by the manager, it’s sent along to Accounting to be processed.
Below you’ll find key considerations for Actions, Statuses and Roles to create this Expense Report basic approval workflow.
Roles
It’s helpful to first consider the roles that will be involved in your expense report workflow. Creating roles will enable field settings, workflow link sharing, and other components of your workflow to be set up properly.
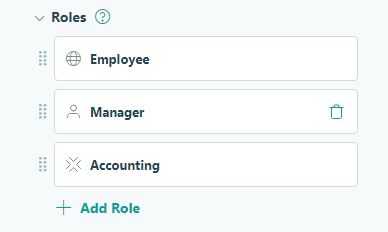
In our example, the roles for the expense report include:
- Employee - The Public role for employee form submissions.
- Manager - An Other role for managers to review (and approve or deny) an expense entry.
- Accounting - The Internal role for admin entry views.
Statuses
The next step in building our expense report approval includes customizing statuses involved in the workflow to easily inform individuals on the state of an expense submitted for approval.
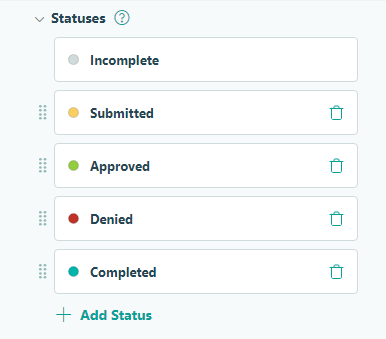
The statuses in our example include:
- Incomplete - The default status for all entries that have not been submitted.
- Submitted - The expense has been submitted by an employee.
- Approved - The expense has been approved by a manager.
- Denied - The expense has been denied by a manager.
- Completed - The expense has been reimbursed by Accounting.
Actions & Email Notifications
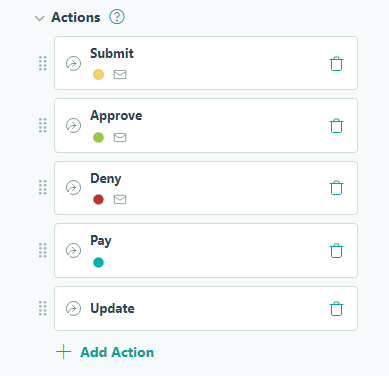
Now that roles have been created and statuses customized, we can begin creating actions for our expense report:
- Submit - For employees to submit a new expense.
- Approve - For managers to approve an expense.
- Deny - For managers to deny an expense.
- Update - For internal admins needing to update an entry.
- Pay - For Accounting to mark that an expense has been reimbursed.
Below you’ll find key Action Settings and email notifications that differentiate each action within our expense report example. If you need more help, visit our Workflow Actions page.
Submit Action
Allow Action - Select ‘When’ to apply conditional logic to allow this action to be performed when the entry status is either Incomplete or Denied. This will ensure an entry can only be submitted to begin the workflow, or re-submitted if a manager denies the expense and an employee needs to update the expense information.

Change Status To - Select ‘Submitted’ to automatically update an entry’s status to Submitted once an employee submits an expense.
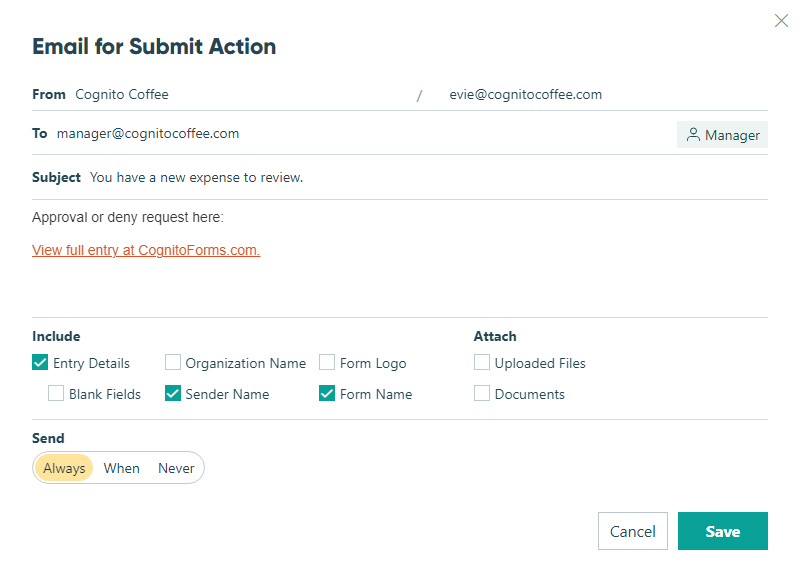
Send Emails - Create two email notifications to be sent upon the Submit action being performed.
-
The first email notification acts as a confirmation email to the employee who submitted the expense. Mark this email to send always, and use the Insert Field option in the To field to prefill the employee’s email.
-
The second email notification is sent to the employee’s manager to let them know an expense has been submitted for approval. Mark this email to send always and input the manager’s email address in the To field. Use the Share Workflow Link option to include a Manager workflow link in the email, which will provide the manager with an entry link that enables them to perform either an Approve or Deny action on the form.
Approve Action
Allow Action - Select ‘When’ to apply conditional logic to allow this action to be performed when the entry status is Submitted and the entry role is not Employee. This will ensure the Approve action can only be performed by managers or admins on submitted entries.
Change Status To - Select ‘Approved’ to automatically update an entry’s status to Approved once this action is performed on an entry.
Send Emails - Create an email notification to be sent upon an expense being approved. Use the Insert Field option to prefill the email of the employee who filled out the expense report, and mark the email to send always.
Deny Action
Allow Action - Select ‘When’ to apply conditional logic to allow this action to be performed when the entry status is Submitted and the entry role is not Employee. This will ensure the Deny action can only be performed by managers or admins on submitted entries.

Change Status To - Select ‘Denied’ to automatically update an entry’s status to Denied once this action is performed on an entry.
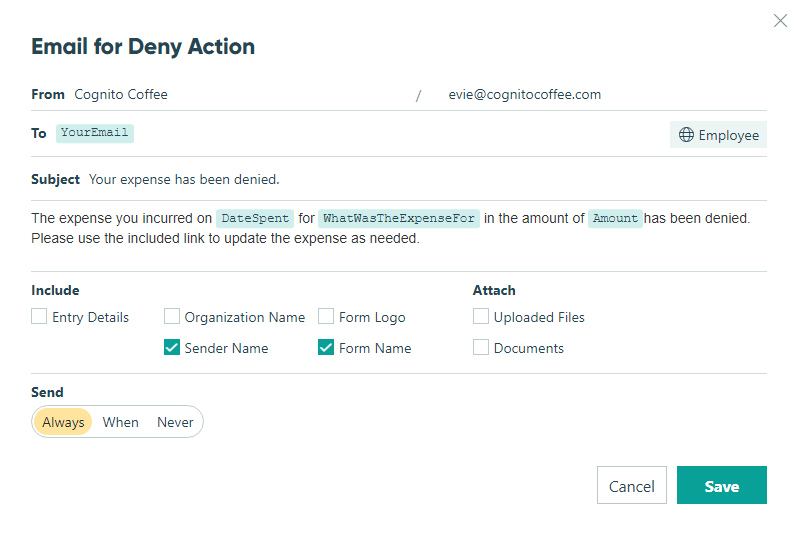
Send Emails - Create an email notification to be sent upon an expense being denied. Use the Insert Field option to prefill the email of the employee who filled out the expense report, and mark the email to send always. Be sure to include an Employee workflow link so that the employee can return to their entry to update the expense information as needed.
Pay Action
The Pay action, available to only the Accounting role, exists for Accounting admins to mark that an expense has been reimbursed to an employee, marking the end of the workflow.
Allow Action - Select For Roles > Accounting to only allow this action to be performed by an internal Accounting admin.
Change Status To - Select ‘Completed’ to automatically mark an entry as completed when the Pay action is performed.
Update Action
In our expense report example, we’ve included an Update action in the event an Accounting admin needs to update entry information during or after the workflow. The key setting for this action is enabling it only for the Accounting role.
Allow Action - Select For Roles > Accounting to only allow this action to be performed by an internal admin.
Other Considerations
Once you’ve considered the above settings, it may be helpful to make specific updates to your workflow. For example, making certain fields read-only or conditionally showing a field based on status can help make your workflow more efficient for your scenario.
For more help setting up your workflows, check out our Workflow help section.