Workflow Tasks make it easy to collaborate by turning form entries into organized to-do lists for your team. As your workflow progresses, participants can log in to Cognito Forms to view and complete their assigned tasks – ensuring everyone stays on track at every step.
Creating Workflow Tasks
To create Workflow Tasks, start by setting up your form’s workflow automation with the appropriate actions, statuses, and roles (if you haven’t already).
Task views
Task views help you manage workflow progress by turning entries into to-do lists with due dates and email reminders.
-
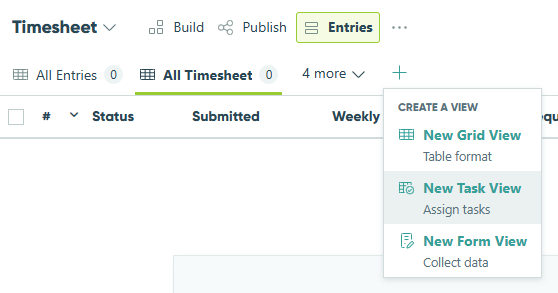
In the sidebar, click the form name to open the Entries page. Click the plus icon (+) and select New Task View.
-
Customize the Task View settings:
- Update the view name (ex: Pending Approval).
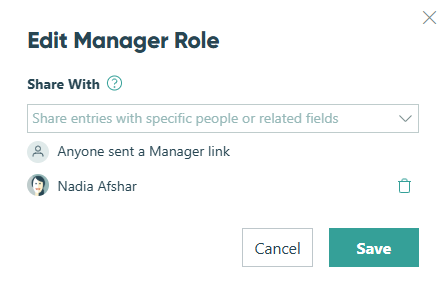
- Choose the workflow Role to assign tasks to. Entries in this view become tasks for anyone assigned to that role. If you haven’t already, make sure entries are shared with the right people for that role. You can update these settings by clicking Edit, or by opening the Edit Role dialog under the Workflow section on the Build page.
- Keep Assign As Tasks enabled (this is on by default). Optionally, set a Priority and Due Date to help organize tasks on the Task Dashboard. Setting a due date allows you to send automated reminder emails for tasks in this view.
- Click Save when you’re done.
-
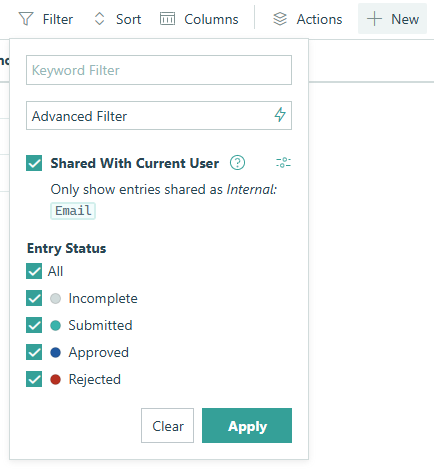
Use the Filter option to control which entries appear in the task view based on your workflow scenario. For example, you can apply a filter to only display entries in the Submitted status. When an entry does not meet the filter criteria (i.e. the entry is approved or rejected), it will no longer appear in the view and the task is complete.
- The filter also includes an option called Shared With Current User, which limits visibility so users only see entries that have been specifically shared with them. See User-specific tasks below to learn more.
- The filter also includes an option called Shared With Current User, which limits visibility so users only see entries that have been specifically shared with them. See User-specific tasks below to learn more.
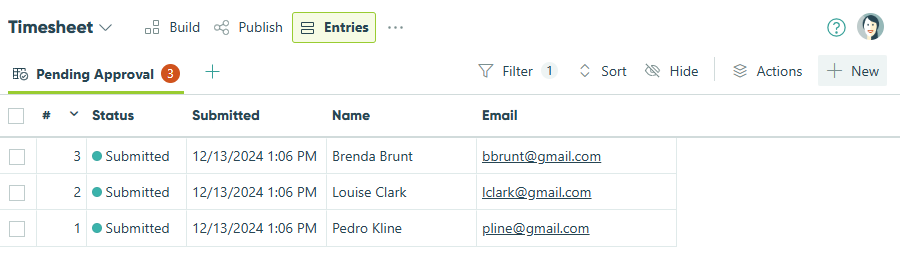
Now, the entry view will display a specific set of entries based on our custom criteria (i.e. entries in the Submitted status). Users in the Manager role will see these entries as tasks.
User-specific tasks
The Shared With Current User filter lets you control which entries appear in a task view based on whether they’ve been shared with the person viewing the list. This is helpful when you want each user to see only the tasks assigned to them – not the entire list for the role.
To set up user-specific task views:
-
On your form’s Entries page, open the task view you want to update and click Filter in the top menu.
-
Select Shared With Current User. Then, click the settings icon to view or adjust role settings for this task view.
-
In the Share With dropdown, choose how you want to share entries with people in this role. By default, entries are shared via workflow links, but you can also share them with specific organization members or based on Email fields or Person fields on your form.

-
Click Save to apply your changes to the task view.
Now, when users assigned to that role log in, they’ll only see the entries specifically shared with them in that task view. Each user can potentially see a different set of entries in this view and cannot see entries that have not been shared with them.
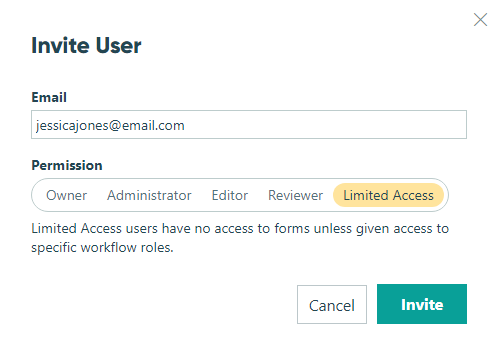
Inviting users
You’ll need to invite the appropriate users to your organization so they can see their tasks and know what work needs to be done. If you want to give a user access to a specific entry view without allowing them to make changes to your form or view all the entries, make sure to set their permission level to Limited Access.
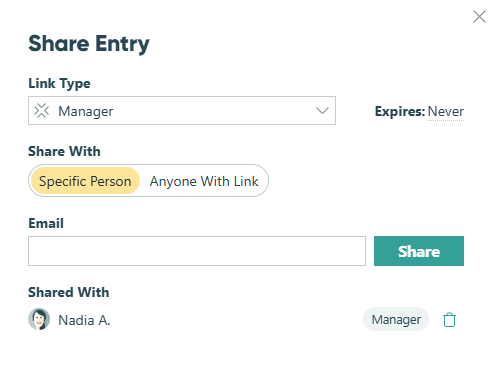
You can use the Share function to see everyone you’ve shared an entry with. From the Entries Page, open the entry and click Share in the top menu.
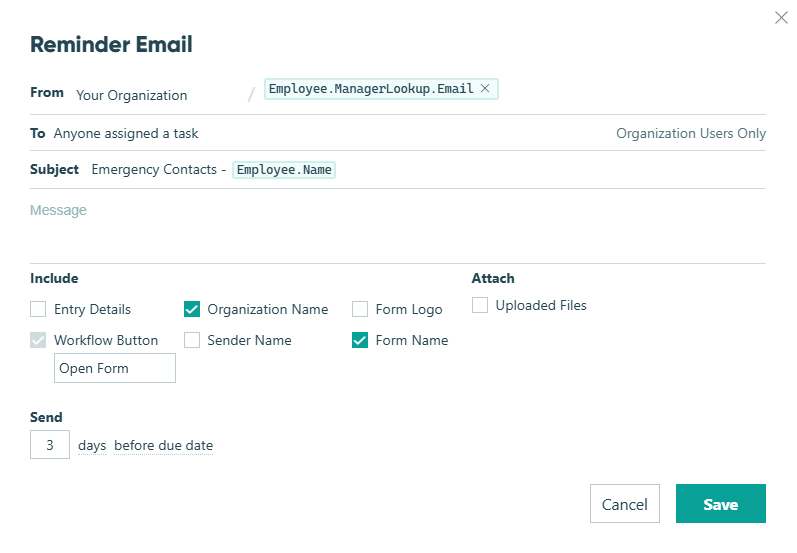
Reminder emails
Ensure workflow tasks are completed on time with automated reminder emails. These emails notify workflow participants about upcoming or overdue tasks, helping keep processes on track. You can schedule up to three reminders per task in the Task view settings. Learn how to set up reminder emails.
Completing tasks
When users log in to Cognito Forms, they can quickly access their task assignments at the top of the sidebar or on the right side of the Home page (if read/unread entry tracking is turned off). Additionally, forms with pending tasks are listed in the sidebar.

Task dashboard
To easily view and complete all your pending tasks in one place, click Tasks at the top of the sidebar to open the task dashboard. The tash dashboard can display up to 1,000 pending tasks.
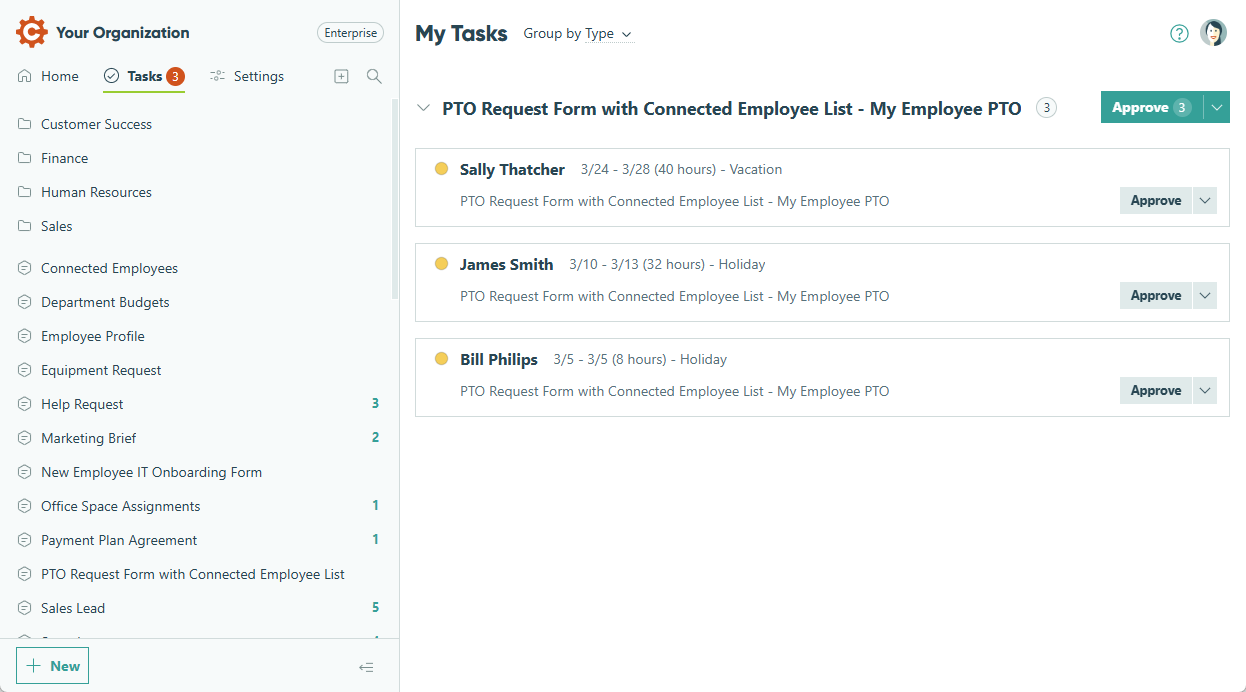
At the top of the dashboard, use the dropdown menu to organize tasks:
- Type – Sorts tasks alphabetically by form name.
- Priority – Sort tasks from highest to lowest priority.
- Due Date – Sort tasks in order of approaching deadlines (soonest first).
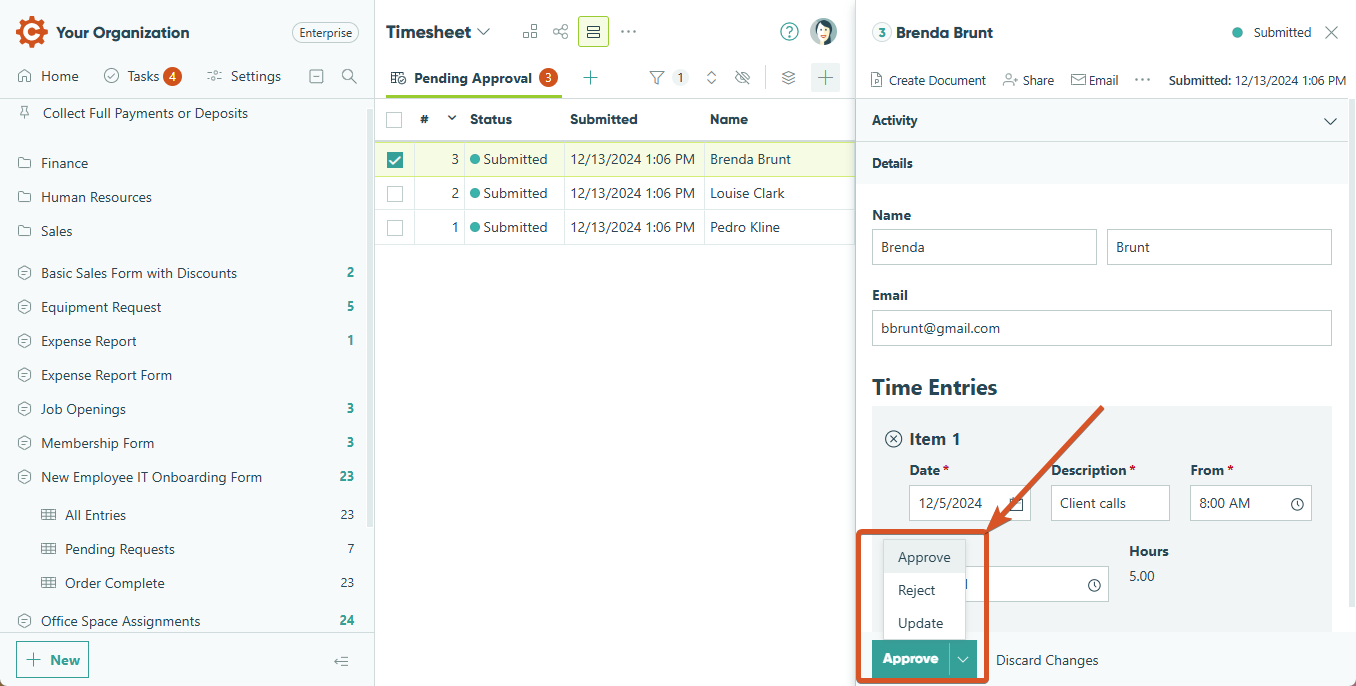
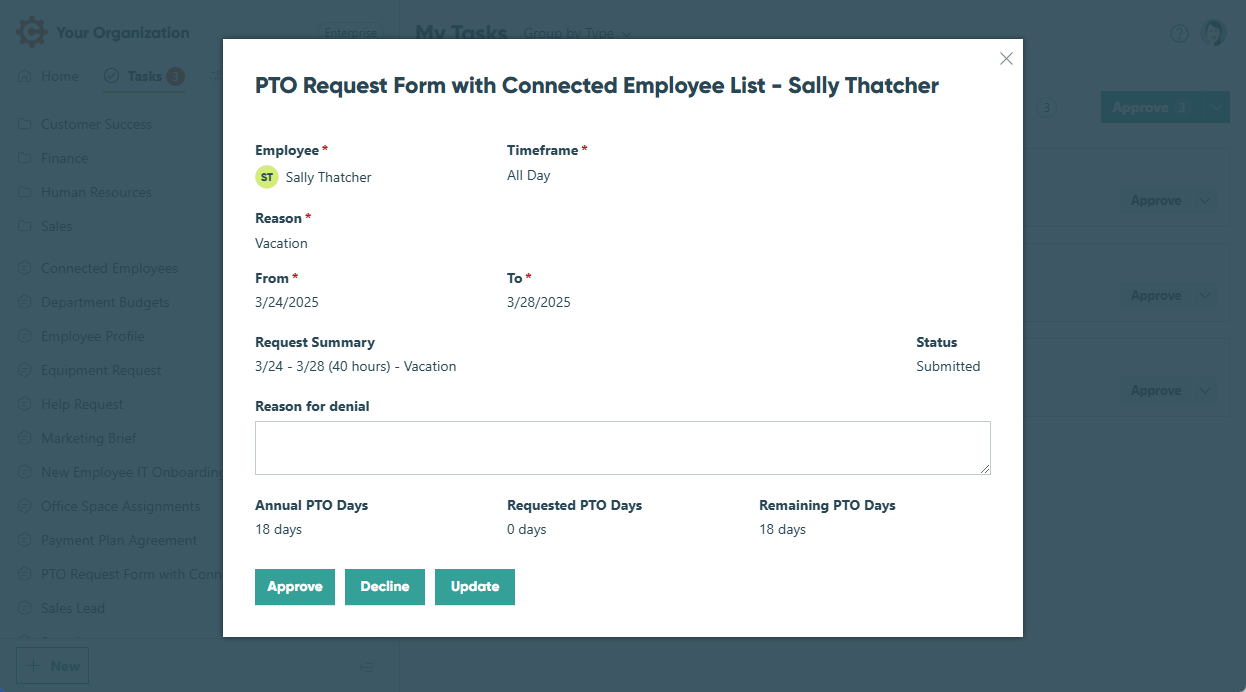
Complete a task by performing the appropriate action on the entry. For example, if your task view is filtered to show only entries with a Submitted status, changing an entry’s status to Approved will mark the task as complete. When tasks are sorted by Type, you can use the blue dropdown next to the task view name to apply an action to all tasks in the view at once.
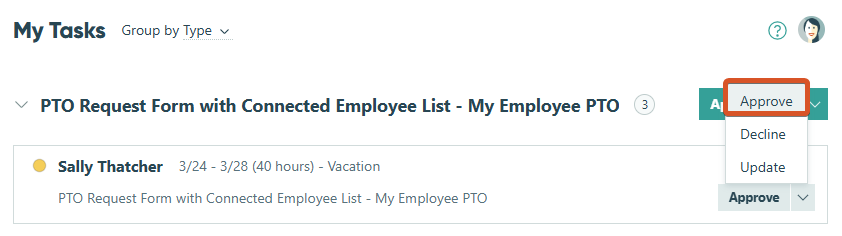
Click on an individual task to view the entry details, edit the entry, and perform workflow actions.
Pending task views
In addition to the task dashboard, you can also complete tasks directly from the Entries page. Log in to Cognito Forms and open the entry view with pending tasks from the sidebar.
Complete a task by performing the appropriate action on the entry. For example, your task view may have a filter that only displays entries in the Submitted status. In this case, changing the entry status to Approved will remove the entry from the view and complete the pending task.