A parallel approval workflow enables two or more individuals to submit an approval at the same point in a workflow, meaning multiple approvals can take place on a single form in any order.
An example of a workflow that might require a parallel approval is a Job Offer Approval. In this workflow, an HR admin begins the process by inputting information about the candidate and the details of the job offer. From there, an email containing a workflow link is sent to both the Hiring Manager and the Department Head with a request for an approval signature. These two individuals can sign their approval at any time, without needing to wait for the other to submit an approval first. Once both signatures have been filled out, the workflow is complete.
This guide follows our Job Offer Approval template, and below you’ll find the key considerations for creating this type of workflow.
This page is meant to serve as a guide to inform your own workflow. For a more in-depth look into creating workflows with Cognito Forms, be sure to check out our Workflow help section.
Setting up a Job Offer Approval
In our Job Offer Approval template, you’ll find multiple sections that exist on the form. Grouping relevant fields together in sections enables you to make certain fields read-only based on the role of the individual, which is key to making our parallel approval workflow efficient.
Roles
Because our workflow requires two approvals from two different individuals, we want to be sure to create a role for each of the required signatures needed in our Job Offer Approval. These roles also impact other parts of our workflow, such as the Read-Only fields described below.
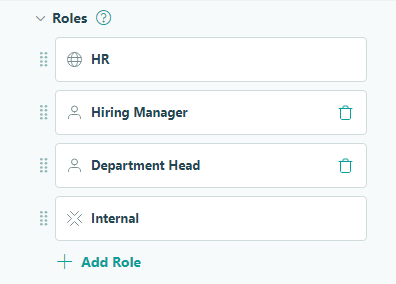
In our example, the roles for the Job Offer Approval Workflow include:
- HR - The Public role that submits a Job Offer Approval form for review.
- Hiring Manager - An Other role for workflow link sharing to provide a signature.
- Department Head - An Other role for workflow link sharing to provide a signature.
- Internal - The Internal role for HR admin entry views.
In our example, the sections titled Candidate Information and Compensation will be filled out by HR. There are also two read-only sections for both the Hiring Manager and the Department Head to provide their signatures for approval.
To enable these efficiencies, the Field Settings for each section include:
- For the both the Candidate Information and Compensation sections, set the Read-Only settings to For Roles > Hiring Manager + Department Head.

- For the Hiring Manager section, set the Show This Field settings to For Roles > Hiring Manager + Internal.

- For the Department Head section, set the Show This Field settings to For Roles > Department Head + Internal.

Statuses
The next step in building our workflow includes customizing statuses to easily inform HR admins the state of a Job Offer Approval.
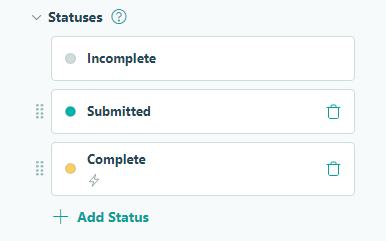
The statuses in our example include:
- Incomplete - Entries not fully submitted by HR admins will show as Incomplete.
- Submitted - The feedback form has been sent to both the Hiring Manager and Department Head for approval signatures, and either one or none of their signatures have been filled out.
- Complete - The Job Offer Approval has been signed by both parties.
The Complete status has conditional logic assigned that moves an entry to this status when both signature fields have been filled out.

Actions & Email Notifications
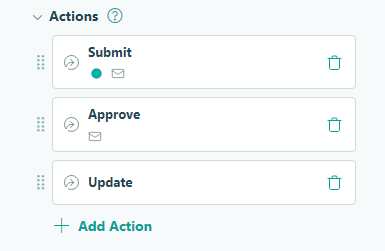
Now that roles have been created and statuses customized, we can begin creating actions for our Job Offer Approval. The actions include:
- Submit - For HR admins to submit a new Job Offer Approval, which begins the workflow.
- Approve - For the Hiring Manager and Department Head to approve an entry.
- Update - For HR admins to update an entry as needed.
Below you’ll find the key Action Settings and email notifications that differentiate each action within the workflow. If you need more help, visit our Workflow Actions page.
Submit Action
Allow Action - Select ‘When’ to apply conditional logic to allow this action to be performed when the entry status is Incomplete. This will ensure an entry can only be initially submitted by HR to begin the workflow.
Change Status To - Select ‘Submitted’ to automatically update an entry’s status to
Submitted once the initial Job Offer Approval has been initiated.
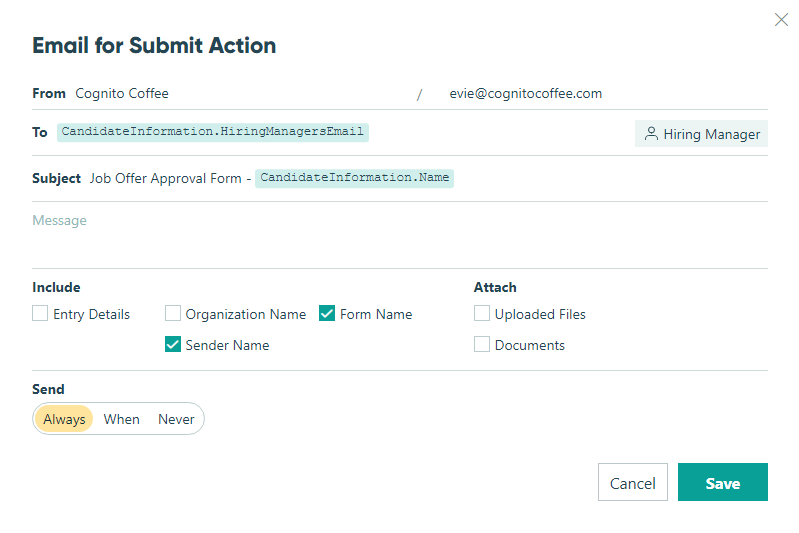
Send Emails - Create two email notifications to be sent upon the Submit action being performed. These email notifications will be identical except for who they are sent to; use the Insert Field option to include the email address of each person an approval signature is being requested from. Be sure to also include the appropriate workflow link that corresponds to each email recipient (the Hiring Manager or Department Head role).
Approve Action
Allow Action - Select ‘When’ to apply conditional logic to allow this action to be performed when the entry status is Submitted.
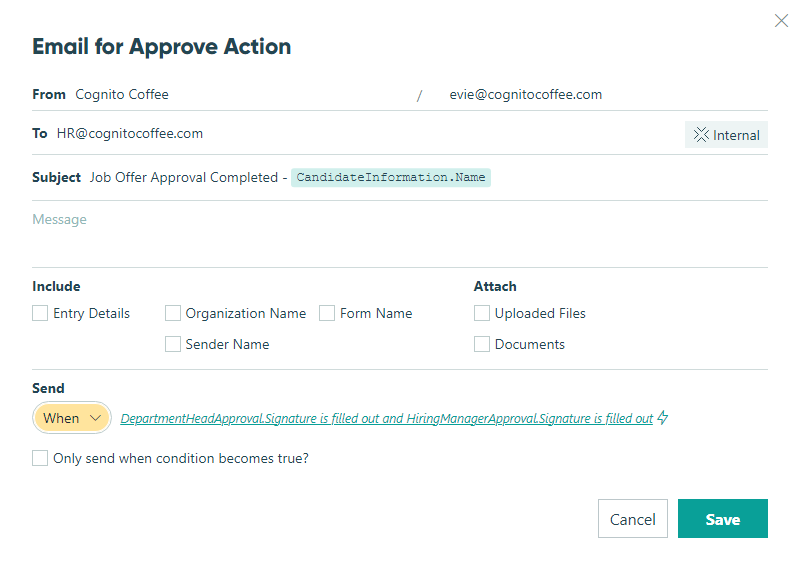
Send Emails - Create an email notification to be conditionally sent to HR when both required signatures have been filled out, notifying HR that the Job Offer Approval workflow is complete. Be sure to include an Internal workflow link to enable HR to view the completed entry data.

Update Action
Allow Action - Select For Roles > Internal to only allow this action to be performed by the Internal role. This will ensure the job offer details can only be updated by HR.
Other Considerations
Once you’ve considered the above settings, it may be helpful to make other specific changes to your workflow. For example, making certain fields read-only or conditionally showing a field based on status can help make your workflow more efficient for your scenario.
For more help setting up your workflows, check out our Workflow help section.