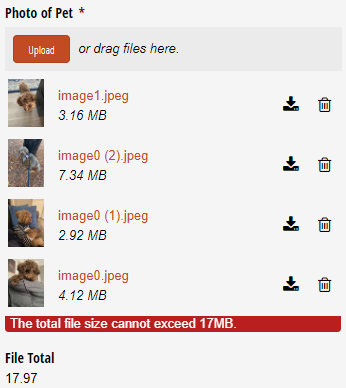
If your form has a File Upload field, you can use the Maximum File Size option in the field settings to limit the file size allowed for a single uploaded file. Alternatively, use the calculation below to limit the total size of all uploaded files combined.
To limit the total size of all uploaded files in a File Upload field:
-
Add a Calculation field to your form labelled ‘File Total’. Set the field type to Number.
-
Use the following expression to calculate the total size of all the files in your File Upload field. Make sure to replace ‘PhotoOfPet’ with the name of the File Upload field on your form:
=((PhotoOfPet.Sum(Size)) / 1024) / 1000 -
In your File Upload field settings, select Show Custom Error - When and set a custom error to appear when the File Total field sum exceeds your specified limit. In this case, we’re setting a limit of 17MB (the same limit for file attachments in email notifications and confirmations). Make sure to include a custom error message (ex: “The total file size cannot exceed 17MB.”).

-
Save your changes. Now, an error message will appear when the total file size is exceeded.
In Cognito Forms, you can use if/then statements to enable a variety of both simple and complex scenarios on your forms. You can also combine these statements to set specific conditions based on your own custom criteria. For example, you can display multiple different messages depending on whether participants can attend your event or not.
To create a string of multiple if/then statements:
- Add a Choice field to your form (ex: ‘Will you be attending?’) with the options ‘Yes’, ‘No’, and ‘Maybe’.
- Add a Calculation field to your form. In the advanced editor, you can enter a series of if/then statements, separated by ‘else if’. Ex:
=(if WillYouBeAttending = "Yes" then "We can't wait to see you there!" else if WillYouBeAttending = "No" then "We wish you could come!" else if WillYouBeAttending = "Maybe" then "We hope you can make it!" else "") - Save your changes. Now, a custom message will appear when a specific choice is selected.

To reference Signature fields in the Advanced calculation editor, make sure to add .Svg after the name of the Signature field. For example, to display a field on your form only when the Signature field is filled out:
- Add a Signature field to your form labelled ‘Signature’.
- Add the field that you want to appear after someone enters their signature. Then, select the Show This Field - When option. In the Basic Editor, you can set the field to only be visible when the Signature field is filled out:

Or, open the Advanced Editor and use the .Svg property to reference the Signature field: =(Signature.Svg != null)
- Make sure to save your changes.
You can use the Maximum and Minimum functions in calculations to determine the highest or lowest number out of multiple field values.
To compare the minimum/maximum between two values:
- Add two Number fields to your form (ex: “Value 1 and Value 2”).
- Add a Calculation field to your form labelled ‘Minimum’ or ‘Maximum’. For your calculation, use the .Max or .Min function to compare the two fields:
=Math.Max(Value1,Value2)or=Math.Min(Value1,Value2) - The Calculation field will now display either the highest or lowest value:

To compare the minimum/maximum between more than two values:
- Add three Number fields to your form (ex: “Value 1, Value 2, Value 3”).
- Add a Calculation field to your form labelled ‘Minimum’ or ‘Maximum’. For your calculation, use the .Max or .Min function to compare the three fields:
=Math.Max(Value1, Math.Max(Value2,Value3))or=Math.Min(Value1, Math.Min(Value2,Value3))Here, we’re setting up one function inside of another so that two of the values are compared first, and the resulting value is compared to the last one. - The Calculation field will now display either the highest or lowest value:

Here are two ways to check if an entered zip code (or postal code) is valid:
-
Check the zip code and display an error if the entered zip code is not in the approved or valid list:
- Add an internal Textbox field to your form labelled ‘Valid Zip Codes’. Set the default value to a comma-separated list of all the valid zip codes, ex:
10451,10452,10453,10454,10455,10456,10457,10458 - Add an Address field with the Zip Code option included. In the field settings, select Custom Error > When and use an expression to compare the entered zip code with the list of valid zip codes:
=(!ValidZipCodes.Contains(Address.PostalCode)) - Make sure to include a custom error message (ex: “Your zip code is not supported.”), and save your changes.

- Add an internal Textbox field to your form labelled ‘Valid Zip Codes’. Set the default value to a comma-separated list of all the valid zip codes, ex:
-
Display a specific value based on the entered zip code in another field:
- Add an Address field to your form with the Zip Code option included.
- Add three Calculation fields to your form:
- Name the first Calculation field “Index” and set the type to Number. Use the following calculation:
=Mapping.IndexOf(Address.PostalCode) + Address.PostalCode.Length + 3 - Name the second Calculation field "Zone Calculation and set the type to Text. Use the following calculation:
=Mapping.Substring(Int32(Index), Mapping.IndexOf("""",Int32(Index)) - Int32(Index)) - Name the third Calculation field “Mapping” and set the type to Text. Here, you will insert your list of zip codes and associated values, ex:
"12345" "Zone A";29063" "Zone D";"11111" "Zone B"

- Name the first Calculation field “Index” and set the type to Number. Use the following calculation:
In the example above, we took the Zone Calculation field value and set it as the default value for the “Zones” Choice field with associated prices.
You can create a Textbox field that only accepts numbers using the Format validation option set to the Numeric option. Or, you can use the Custom Mask option with #### as the Format Mask.
To convert this numeric value to a number:
-
Add a Calculation field set to the Number type – with zero decimals.
-
Set the calculation to:
=int32.parse(Text)Make sure to replace ‘Text’ with the name of the Textbox field on your form. -
The Calculation field will automatically convert the numeric value from the Textbox field into a number.
You can then use this number in calculations.
First, add two Date fields to your form: one for the start date, and one for the end date. There are multiple ways to validate the length of time between the two dates:
- Calculate the number of days between dates: Add a Calculation field set to the Text type, and use the expression:
=CheckOutDate.Days - CheckInDate.DaysMake sure to replace the field names with the exact field names on your form. - Ensure that the check-out date is after the check-in date: First, set the default value of the check-out date field to match the check-in date:
=CheckInDateor the day after the check-in date:=CheckInDate.AddDays(1). Next, set the Minimum range value of the check-out date to match the check-in date:=CheckInDateor the day after the check-in date:=CheckInDate.AddDays(1). You can replace ‘1’ with any specific number of days. - Display an error depending on the number of days between the check-in and check-out dates: Set the Custom Error option for the check-out date field to this expression:
=(CheckOutDate < CheckInDate.AddDays(30))along with a custom error message (ex: “Please select a date within 30 days.”) This expression will display an error when the check-out date is more than 30 days after the check-in date. You can replace ‘30’ with any specific number of days.
Need help getting started? Our Number of Business Days template has these calculations set up and ready to go!
To calculate the number of days (excluding Saturday and Sunday) between two dates:
- Add two Date fields to your form – one labelled Start Date, and another labelled End Date.
- Add a Calculation field to your form labelled Number of Days. Set it to the Number type, and make sure that it’s set to internal view only. Then, use the following expression:
=(EndDate - StartDate).Days - Add another Calculation field labelled Number of Business Days. Set it to the Number type and use the following expression:
=if StartDate.DayOfWeek = "Monday" then Math.Min(1+NumberOfDays%7,5) + (if NumberOfDays>6 then 5*Math.Floor(NumberOfDays/7) else 0) else
 if StartDate.DayOfWeek = "Tuesday" then Math.Min(1+NumberOfDays%7,4) + (if NumberOfDays>5 then 5*Math.Floor(NumberOfDays/7) + Math.Max(NumberOfDays%7-5,0) else 0)  else
 if StartDate.DayOfWeek = "Wednesday" then Math.Min(1+NumberOfDays%7,3) + (if NumberOfDays>4 then 5*Math.Floor(NumberOfDays/7) + Math.Max(NumberOfDays%7-4,0) else 0) else
 if StartDate.DayOfWeek = "Thursday" then Math.Min(1+NumberOfDays%7,2) + (if NumberOfDays>3 then 5*Math.Floor(NumberOfDays/7) + Math.Max(NumberOfDays%7-3,0) else 0) else
 if StartDate.DayOfWeek = "Friday" then Math.Min(1+NumberOfDays%7,1) + (if NumberOfDays>2 then 5*Math.Floor(NumberOfDays/7) + Math.Max(NumberOfDays%7-2,0) else 0) else
 if StartDate.DayOfWeek = "Saturday" then (if NumberOfDays>1 then 5*Math.Floor(NumberOfDays/7) + Math.Max(NumberOfDays%7-1,0) else 0) else
Math.Min(NumberOfDays%7,5) + (if NumberOfDays>0 then 5*Math.Floor(NumberOfDays/7) + Math.Max(NumberOfDays%7-6,0) else 0)
Essentially, the first calculation determines the number of days between the two dates. Then, the second calculation calculates the total number of days excluding the weekend.
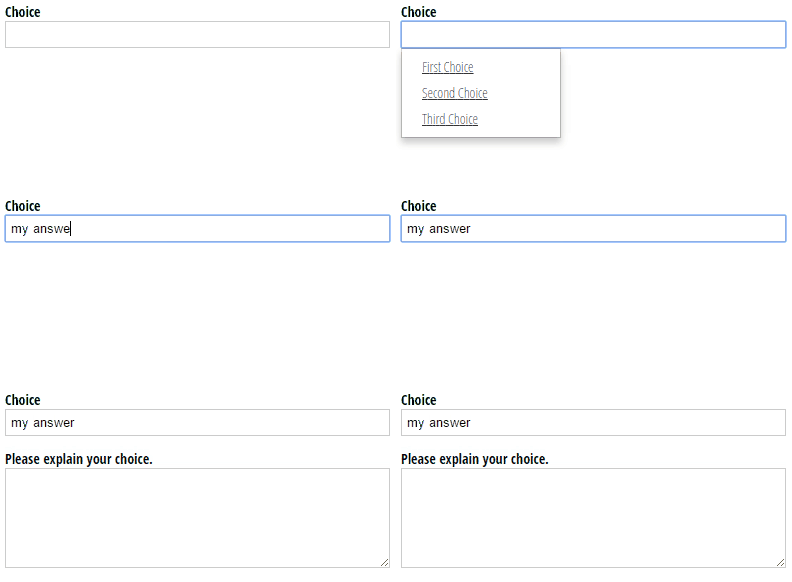
When you have a Choice field that allows for fill in answers, you’ll need to use a slightly different approach to determine when the Allow Fill In option is selected with conditional logic.
For example, let’s say that you want a Textbox field appear when the Allow Fill In option is selected. You have no way of knowing which specific value a form user will enter, so you’ll need to take the opposite approach:
- Find the Show This Field - When option in your Textbox field settings.
- Specify all of the conditions that will not make the Textbox appear, and ensure that the Choice field is filled out.
- Make sure to save your changes.

Now, the Textbox will appear only when someone enters a fill in answer.
In Cognito Forms, you can use the Custom Error option to display custom error messages. For example, you can display an error message when two Email fields do not contain matching addresses:
-
Add an Email field labeled “Email” and another Email field labeled “Confirm Email”.
-
Select the Confirm Email field and find the Show Custom Error - When option in the field settings.
-
Set an error to display when the two Email field values do not match:

-
Click Save to close the conditional logic dialog.
-
Enter the error message you wish to show when this error occurs (ex: “Email addresses don’t match.”)
Now, when a user tries to enter a different value into the second email field, they’ll see your custom error message.

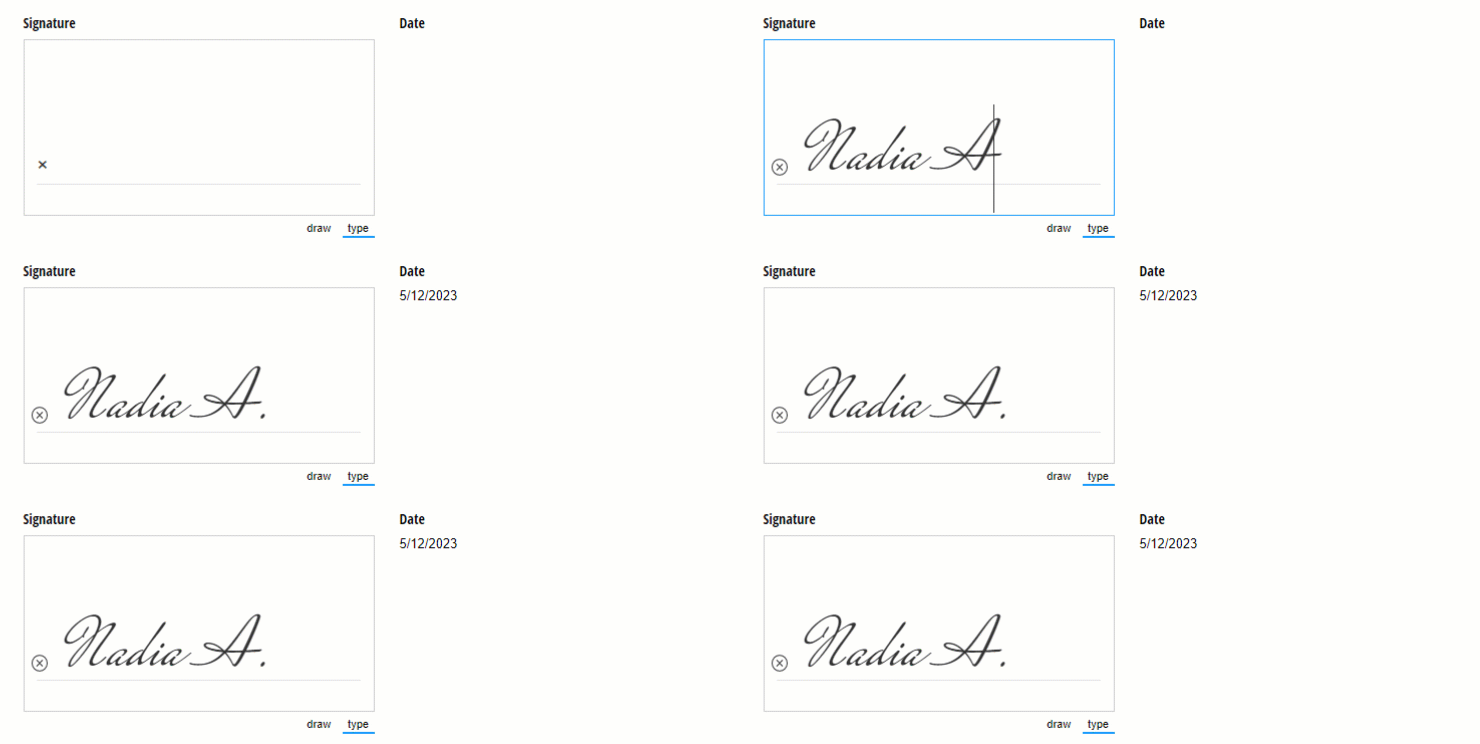
To obtain the current date when collecting an electronic signature:
- Add a Date field to your form and set Show This Field – For Roles to Internal.
- Set the default value of the Date field to
=if Signature.Svg !=null then DateTime.Today else nullMake sure to update ‘Signature’ to the name of the Signature field on your form. - Insert a Calculation field on your form set to the Date type.
- Set the calculation to equal the Date field value (ex:
=Date)
Now, the current date will display next to your Signature field.
Here’s how dates and times are handled in Cognito Forms with regard to time zones:
- Entries generate three different date/time values: Date Created, Date Submitted, and Date Updated. These values can be included as tokens in both content areas and notification/confirmation emails.
- With the exception of DateTime.Today values, dates and times shown to users via the web browser are always in the user’s time zone, not the form’s time zone. This means the date that appears on the confirmation page will be your local time zone.
- Dates and times that are transmitted as formatted text (Ex:
=Entry.DateSubmitted.ToString("dd/MM/yyyy")) are converted into the timezone of the form. This includes email messages, generated documents, and Excel exports. - Data integrations and JSON posts use the ISO 8601 date format for transmitting dates and times uniformly. This is now the accepted industry standard way of representing points in time in text format when a time zone must be specified. These dates are, therefore, in UTC.
These rules only apply to date/time values. Date-only and Time-only fields adhere to the form’s timezone rather than the user’s timezone. So for now, these rules primarily apply to the entry dates.
To set the number of checkboxes that someone can select from a Choice field:
- Open your form builder and select the Choice - Checkboxes field.
- Select Show Custom Error - When in the field settings.
- Click the Advanced Editor tab and insert the following expression:
=(Checkboxes.Count() > 3)Make sure to change “Checkboxes” to the name of your Choice field, and “3” to the maximum number of checkboxes that can be selected. - Click Save. Write the custom error message that appears when a user tries to select more than the specified number of options.

To automatically capitalize the first letters of a first and last name:
- Add a Textbox field to your form labelled Name.
- Set the default value of the Textbox field to the following expression:
=(Name.Split(' ').Select(it.Substring(0,1).ToUpper() + it.Substring(1))+ "").Replace(", ", " ") - When someone enters their name, the default expression will separate their first and last name by spaces to ensure that the first character of each name is capitalized.

To calculate the number of hours based on the difference between two Date fields:
- Add two Date fields to your form, labelled “Start Date” and “End Date”.
- Add two Time fields to your form, labelled “Start Time” and “End Time”.
- Add a Calculation field labelled Total Hours, and insert the following expression:
=(Math.Round((EndDate.AddMinutes(EndTime.Minute + (EndTime.Hour * 60)) - StartDate.AddMinutes(StartTime.Minute + (StartTime.Hour * 60))).TotalMinutes / 15) / 4) - Now, when the user inputs their start and end times, the Calculation field will automatically display the total number of hours in 15 minute increments:

To total the number of items in a repeating section, you can use the Count() function.
For example, let’s say you have an Event RSVP form that collects guest information in a repeating section. To calculate the total number of guests:
- Add a Calculation field to your form – make sure it’s outside of your repeating section.
- Use the Count() function to total the number of items:
=Guests.Count(). - Now, the field will calculate the total number of guests.
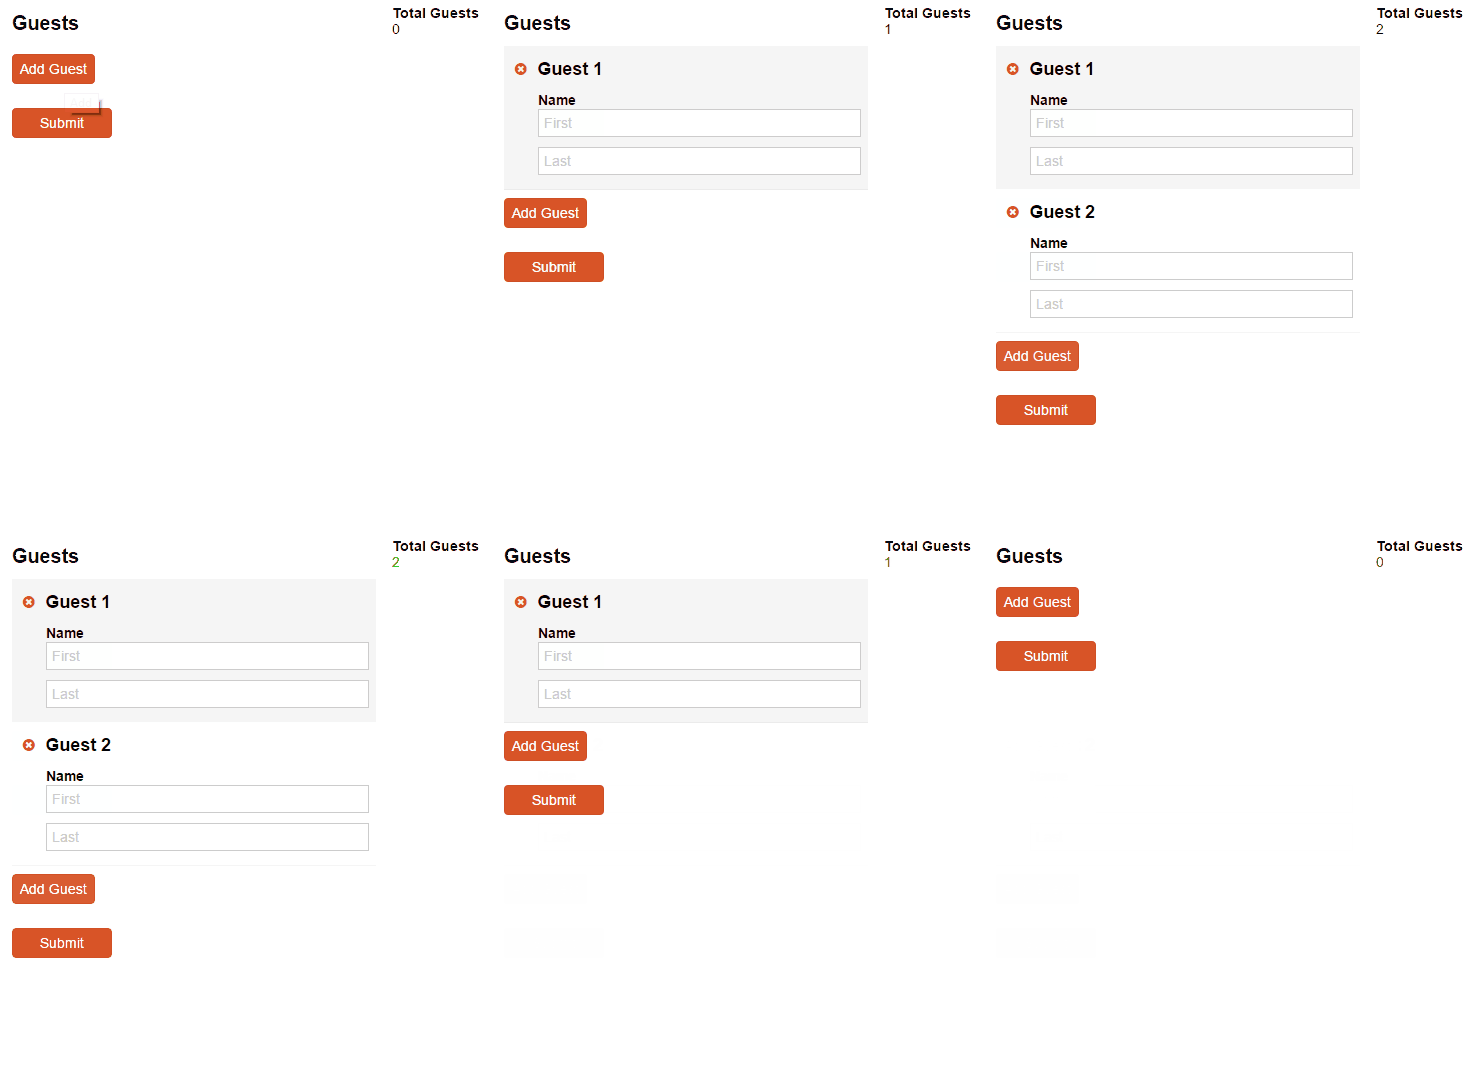
You can also add up specific fields inside repeating sections using the Sum function, with the field name in between the parentheses: =Guests.Sum(PricePerGuest)
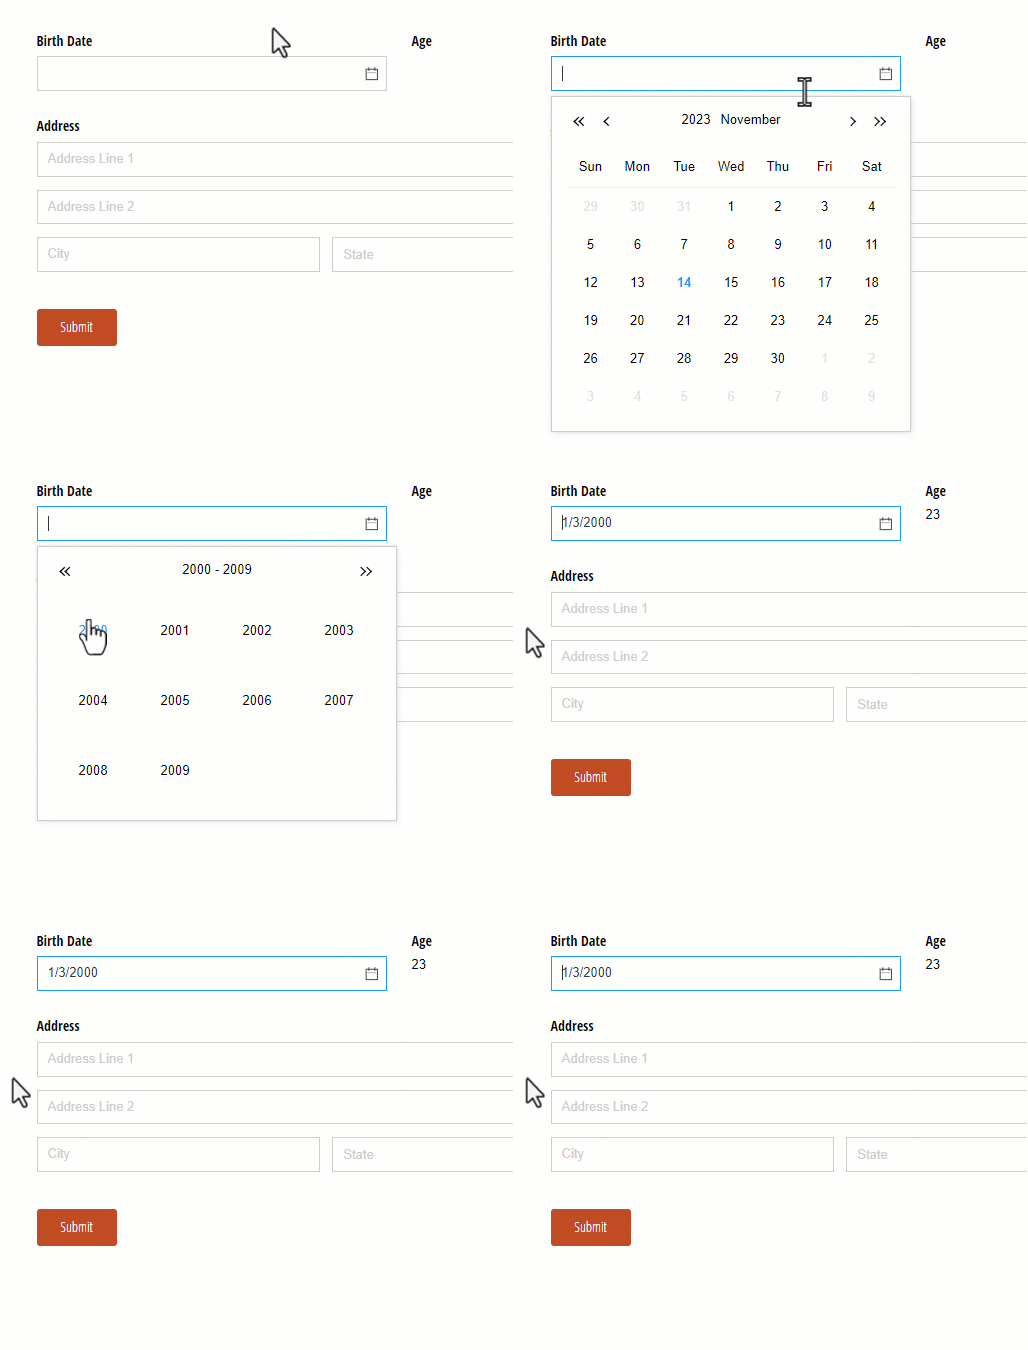
To calculate someone’s age based on their birth date:
-
Add a Date field to your form labelled Birth Date.
-
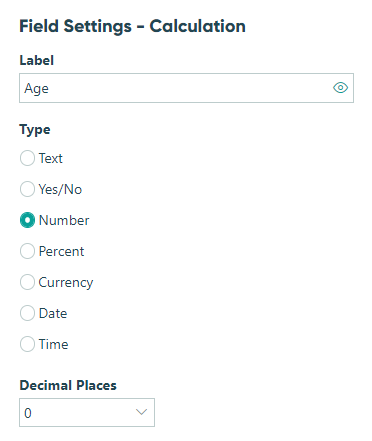
Add a Calculation field labelled Age, set to the Number type with 0 decimal places.
-
Insert one of the following expressions as your calculation:
- Option 1: Calculate age in years using
= DateTime.Today.Year - BirthDate.Year + (if DateTime.Today.Month < BirthDate.Month or (DateTime.Today.Month = BirthDate.Month and DateTime.Today.Day < BirthDate.Day) then -1 else 0) - Option 2: Calculate age in months using
=DateTime.Today.Year * 12 + DateTime.Today.Month - BirthDate.Year * 12 - BirthDate.Month + (DateTime.Today.Day < BirthDate.Day ? -1 : 0)
- Option 1: Calculate age in years using
Now, when a user selects their date of birth, the calculation field will automatically determine their age.
