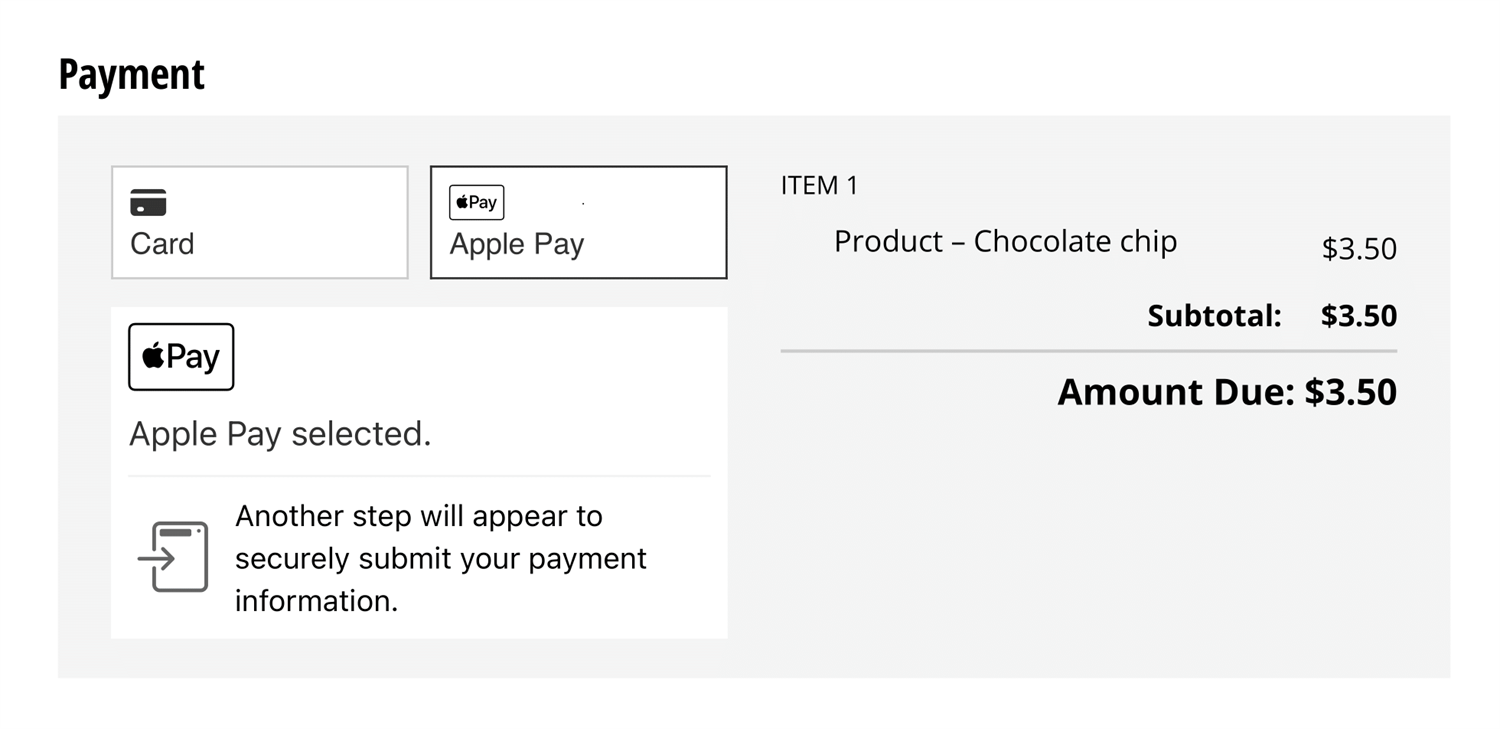
Our integration with Stripe includes support for Apple Pay. Once you connect your Stripe account to your form, Apple Pay will appear as an option in the payment section.
You can turn Apple Pay off and on from your Stripe dashboard:
- Log in to your Stripe account and go to Settings.
- Under Product settings > Payments, select Payment methods.
- Under Select your platform, select Cognito.
- Under Wallets, locate Apple Pay and turn the integration off or on.
Apple Pay Notes
- The Apple Pay option will not display in any browsers other than Safari. View the full list of countries and regions that support Apple Pay.
- If your form is embedded via the Seamless embed option, you’ll need to register your website domain in Stripe in order to use Apple Pay. To register your domain, follow steps 1-4 in the instructions above. After you expand the Apple Pay section under Wallets, click the Configure button and select Add new domain. In the dialog that appears, enter your website domain and complete the file verification.
- If your form is embedded via the Iframe embed option, you’ll need to include an additional attribute in your code:
allow="payment". For example, your Iframe embed code should look similar to:<script src="https://www.cognitoforms.com/f/seamless.js" data-key="-LpDMqjoWgfZXMM8z9I4GA" data-form="13" allow="payment"></script>

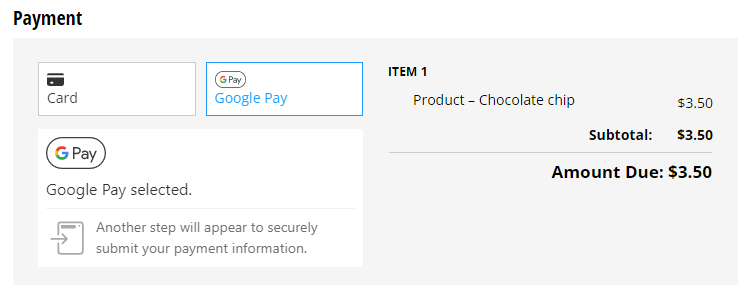
Our integration with Stripe includes support for Google Pay. Once you connect your Stripe account to your form, Google Pay will appear as an option in the payment section.
You can turn Google Pay off and on from your Stripe dashboard:
- Log in to your Stripe account and go to Settings.
- Under Product settings > Payments, select Payment methods.
- Under Select your platform, select Cognito.
- Under Wallets, locate Google Pay and turn the integration off or on.
Google Pay Notes
- The Google Pay option will not display on Apple devices, Google devices without Google Pay enabled, or PCs without Google Pay enabled in Chrome. View the full list of countries and regions that support Google Pay.
- If your form is embedded via the Iframe embed option, you’ll need to include an additional attribute in your code:
allow="payment". For example, your Iframe embed code should look similar to:<script src="https://www.cognitoforms.com/f/seamless.js" data-key="-LpDMqjoWgfZXMM8z9I4GA" data-form="13" allow="payment"></script>

Learn more about collecting online payments in our Collecting Payment guide.
Yes! You can automatically send a confirmation email with a receipt anytime a customer makes a payment on your form, whether it’s with an initial entry submission or after the entry has already been submitted.
To automatically send customers a payment receipt for submitted entries:
-
Create an email notification connected to the relevant action on your form (such as “Submit Payment”).
-
Under the Send settings for the email, select When and set the logic to
=(Order.PaymentStatus = "Paid"). This will ensure the email will only send to the customer when their payment has been processed.

-
In the Include? section, tick the box next to Receipt.
-
Make sure to save your changes.
Yes! You can use our payment integrations to collect payments in foreign currencies and from countries across the world.
Individual payment processors vary in how they handle international payments. Please refer to the help documentation of your payment processor for more information on which countries and currencies they support:
Cognito Forms does not currently support the ability to issue partial refunds directly from the Entries page.
You can, however, issue a partial refund through your connected payment provider. To learn how to do that, just follow these links to the instructions for refunding partial payments through PayPal, Square, or Stripe.
Yes! When you refund a Stripe payment, the customer is refunded the entire amount they paid – including the Cognito Forms processing fee.
Yes, you can.
If, however, you are unable to refund PayPal payments from your Cognito Forms account, you may have Express Checkout disabled in your PayPal settings.
To enable Express Checkout:
- Log in to your PayPal account and go to Profile > Account settings.
- Find My selling tools and the API access section. Select Update.
- On the next page, select Manage PayPal checkout settings.
- Select Accept PayPal payment before API permissions are set up and select Submit.
If you or your customers are not seeing the credit card option on the Paypal Payment page, please ensure that:
- Your account is either Premier or Business.
- The email address you use to log into your PayPal Account is verified.
- Your bank account is linked and verified.
Yes! Our Card on File feature allows you to collect customers’ credit card information, then authorize charges or store it in Stripe or Square for later use. Since card data is only stored at the processor, your business stays PCI compliant and your customers’ privacy remains secure.
Get started with our Credit Card Authorization Form Template.
If you’re collecting payment through Stripe, you have the option to pass processing fees onto your customers in your payment settings. If this option is unchecked, the fees will simply be subtracted from the original total. However, you also have the ability to let your customers choose whether to include processing fees in their order or not.
To give customers the choice to add processing fees to their order total:
- Add a Choice field labelled ‘Include processing fees?’ (or something similar) with the options Yes and No.
- Include a Price field labelled ‘Processing fees’. Set the following equation as the Amount for your field:
=(DonationAmount+.3)/(1-.029) - DonationAmount - Lastly, use the Show This Field - When option to only display the processing fee field when a customer selects ‘Yes’:
=(IncludeProcessingFees = "Yes")
In the above example, ‘DonationAmount’ is the payment field on the form. Make sure to replace this label with the actual name of your payment field. If your form has multiple payment fields, you’ll need to add all of them up to calculate the order total. (ex: PaymentField1+PaymentField2+PaymentField3)
First, this expression takes the order total (DonationAmount) and adds 30 cents (+.3). Then, it divides that amount by the fee percentage (.029) to generate the order total. Finally, it subtracts the donation amount from that total in order to just display the processing fee. Please note that if you’re collecting Stripe payments on the Individual or Pro plans, you’ll need to include extra 1% fee (.039).
Learn more about setting up payment forms in our Collecting Payment guide.
You are not required to embed a payment form within an SSL secured page because all content (including payment data) processed from Cognito Forms is done so over a secure SSL connection.
It is, however, highly recommended as an additional layer of security for you and your customers. Doing so also helps ensure that users won’t receive any type of warning when trying to load SSL secured data from a non-secured page.
Yes! Cognito Forms supports onsite and deferred payments in two ways:
-
Option 1: Add a Choice field called “Payment Options” with two options: “Pay Now” and “Pay Later”. Then, set the “Require Payment When” to this calculation:
=(PaymentOptions = "Pay Now")If a customer chooses “Pay Now”, they’ll have to put in their card information to submit the form. If they select “Pay Later”, they can just submit their order without payment. -
Option 2: Manually create a new entry at any time on the Entries page. In both situations, this will create an Unpaid entry. You can then make a manual payment on this entry via cash or credit card, without ever leaving Cognito Forms.
Yes and no.
While each Cognito Form can only have one account enabled at a time, you can definitely connect different accounts to different forms.
Each of your connected accounts will appear under each form’s “Payment Accounts”. Check the box next to the desired account you’d like to associate with that particular form.
Payment processors vary on how they distribute funds.
To learn more about your deposit schedule, please refer to the help documentation of your individual payment processor(s):
Disputed transactions are handled directly by your payment processor(s), and thus occur outside of Cognito Forms.
Since individual payment processors may vary in how they handle disputed payments, please refer to the help documentation of your payment processor for more information:
The charges related to collecting payment vary depending on your payment provider.
Users on our Team and Enterprise plans can process payments through Stripe, PayPal or Square, without any additional fees above what the processors charge.
Users on our Individual and Pro plans can process payments through Stripe for an additional charge of 1% of the payment amount (plus any fees Stripe charges). Stripe’s fees can be passed on to your users or taken out of the payments you receive if you collect money in the same currency as your Stripe account.
If you would like pay for your Cognito Forms subscription by check, please refer to our Plans & Billing guide for more information.
At this time, we don’t support processing electronic check payments or ACH transactions on your forms.
Alternatively, if you’re collecting physical checks, you can manually mark an entry as paid using the Submit Payment button on the Entries page. In the dialog that appears, select Mark as Paid. Or, if you haven’t connected a payment account to your form, use the Pay Cash button instead.

While we do not support recurring billing in Cognito Forms, you can use our Card on File feature to set up subscriptions within Stripe or Square.
Yes - you can collect sales tax through your form. However, sales tax is not automatically calculated and collected for the payments you collect.
If your local sales tax is a flat percentage of the total purchase, use the “Additional Fees” option to collect that amount.
To add a flat-percentage sales tax to an item on your form:
- Open your form’s payment settings.
- Find the ‘Additional Fees’ option in the bottom of the payment settings menu.
- Add a label and enter a flat amount or percentage fee.
Learn more about setting up your payment forms in our Collecting Payment guide.
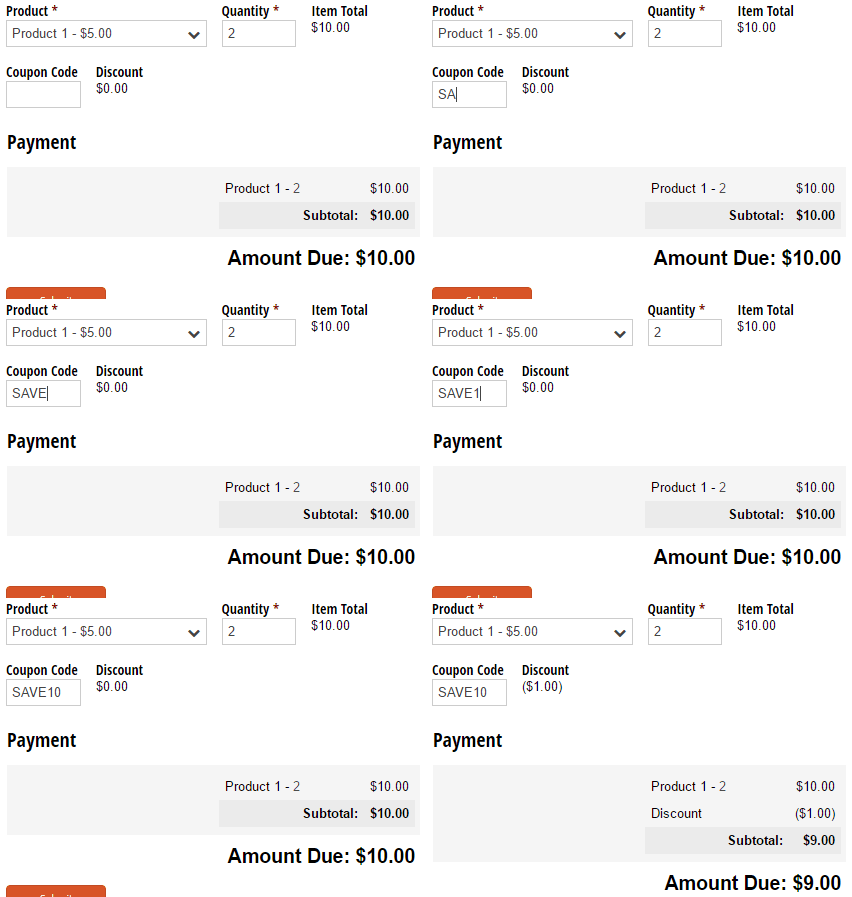
Need help getting started? Our order form template has a coupon code field set up and ready to go!
To create a coupon code or add a discount to your payment form:
- Add a Textbox field for customers to type in their coupon code.
- In your Coupon Code field settings, select Show Custom Error - When. Set an error to appear when the coupon code field is filled out, and the entered code is not correct:
=(CouponCode != null and CouponCode != "SAVE10")Make sure to include a custom error message as well (“Invalid code.”) - Add a Price field to calculate the discount, and enter your discount expression in the Amount section of the Price field settings:
=if CouponCode = "SAVE10" then -ItemTotal* 0.10 else 0

Per our Terms of Service, we prohibit the collection of credit card data in Cognito Forms.
However, we do offer several secure payment integrations for processing credit card payments on your forms. Two of these, Stripe and Square, offer secure and PCI-compliant card data storage via our Card-on-File feature. This feature, available on the Team plan and above, ensures that card data is transmitted directly to and saved on the processor’s servers.
When used properly, Cognito Forms servers never process, store, or transmit credit card information.